In this page:
- Assign Geographies to a Project
- Assign Geographies to Projects using an Excel Template
- Advanced Geography Settings
Assign Geographies to a Project
All indicator data in DevResults is associated with a geographic place, and all indicators in DevResults have exactly one geographic disaggregation, like location, country, region, or world. DevResults distinguishes between two types of geographies:
- Locations: Specific points on a map with GPS coordinates such as cities, hospitals, and schools
- Administrative Divisions: Shapes or areas such as districts, countries, and multi-national regions
Projects need to be assigned to the geographic places where they report direct entry data.
- If a project reports on indicators disaggregated by location, locations must be assigned to the project.
- If a project reports on indicators disaggregated by an administrative division, that type of administrative division must be assigned to the project. For example, if a project reports on an indicator with a geographic disaggregation of "district", one or more districts must be assigned to that project . (Note: The whole country or whole world is assigned by default.)
To assign geographies to a project, go to Program Info > Projects and select your project from the index. Then go to that project's Geography tab. Within the geography tab, you will see tabs for each geographic level in your DevResults site.

For each geographic level, a note shows how many indicators are disaggregated by that geographic level. Click on View indicators to see a pop-up of the list.
For each level with indicators, click the drop-down and select the geography you want to assign. Typing a few characters will narrow the list for you.
The newly assigned geography will now appear in the list of geographies for that project, and will be included in data entry templates for direct entry indicators. Assign as many geographies as needed.
Assign Geographies to Projects using an Excel Template
DevResults also offers tools to assign geographies to projects using an Excel template. There are two versions: One template for a single project, and one template for multiple projects at the same time.
How to import assignments of geographies to a single project
On the project's geography tab, click Export Mappings download a template.

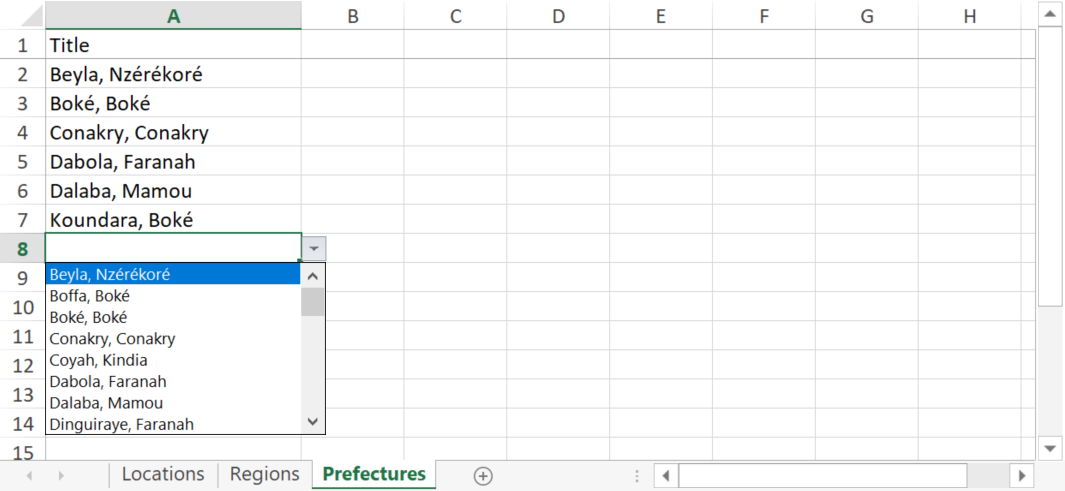
The template comes with a tab for each geographic level and built-in drop-downs for each geographic place in the site. Fill it out and re-import it using the Import Mappings button.

How to import assignments of geographies to multiple projects
To import geography assignments for multiple projects in one template, go to the Tools > Bulk Imports page. In the Project Geography Mappings section, download a blank template.

Here's an example of a template for project geography mappings. There's a tab for each level: Region, prefecture, and location. (Your site might have different levels). It shows three projects being assigned to a few regions each, with built-in dropdowns for the projects and geographies in the site.

Use the Import Project Geography Mappings button to import the template.
Advanced Geography Settings
If a project's indicators vary over time, or if the geographic scope of the project varies over time, you have the option to use Advanced Geographies.
The geography tab establishes which places appear in reporting templates for direct entry indicators. It is 100% fine to show all of a project's indicators and geographies in all the reporting period templates, and then just fill out the relevant data in the template each period. But you might prefer to customize the templates to change which indicators and places appear for which reporting periods.
To do so, click on Advanced Geographies. Check the boxes for:
- Different places report on different indicators (shown below): This provides the ability to enable/disable individual geographies for different indicators (grouped by results framework, since there could be dozens of indicators).
- Active places vary over time: This provides a timeline with each of the project's reporting periods. Click on each reporting period to configure the geographies for that period. Clicking the Advanced menu again will give you the option to Apply to all future reporting periods. Checking this box copies the settings to all future reporting periods. The system will prompt you to make sure you want to make the change. Click Yes, apply to continue with the change.
- Or both.
Edits to these pages do not affect existing indicator results; they only affect what geographies are available in data entry templates.

Note: If you are unable to complete these actions, then you do not have permission to assign geographies to projects. Please speak to your supervisor.
Didn't answer your question? Please email us at help@devresults.com.