Here are the steps to follow to report data successfully from one DevResults site to another:
- Download the Enterprise Linking Request Template.xlsx
- In the first row, enter the URLs for the sites that you would like to link
- In the following rows, enter in the names of the projects on each site that you would like to link. If you are linking multiple projects on the publishing site to a single project on the enterprise site, please enter in the enterprise project name for each row. For example, if two projects in site A publish to project "BetterBetter" in site B, list "BetterBetter" in the site B column twice.
- Email the completed Excel file to DevResults at help@devresults.com with the subject line Enterprise Linking Request.
Once your projects have been linked, you will need to link indicators, disaggregations, and administrative divisions to ensure you can publish data. Below is a checklist of all items that need to be linked, as well as the other conditions that need to be fulfilled to successfully publish data.
Checklist for data publishing
- Administrative Division Levels are linked.
- Administrative Divisions and Locations are linked.
- Indicators are linked. (Note: Directly copying indicators from the Indicator Library will automatically link them.)
- Disaggregations and disaggregation categories are linked.
- One project on the publishing site has data entered and approved.
- Reporting period on the publishing site is certified and compatible with the reporting period on the enterprise site (they run for the same length of time and the publishing start and end date fall within the enterprise start and end date).
- Data can be entered on the corresponding period on the enterprise site (the submission window is open and is not set to a Submitted/Approved status)
- The project on the enterprise site has appropriate geography mappings to receive published data
- The project on the enterprise site has appropriate reporting period mappings to receive published data
- The project on the enterprise site is assigned to the indicator
- The indicator on the enterprise site is set to “direct entry”
- The linked indicators are compatible:
- The publishing indicator cannot have a less granular geographic disaggregation than the enterprise indicator. (i.e.: you cannot publish country-level data to an indicator that’s set to report at the location level, but you can publish location-level data to a country-level indicator.)
- The indicator type matches (e.g.: they’re both ‘sum’)
- The publishing indicator must have all the disaggregations that exist on the target indicator (e.g.: you can't publish data disaggregated by sex to an indicator that is disaggregated by sex AND age, but you can publish an indicator disaggregated by both to an indicator that is only disaggregated by one or the other.)
- The enterprise indicator must report per project.
For a quick overview on what is and is not linked, go to Administration > Enterprise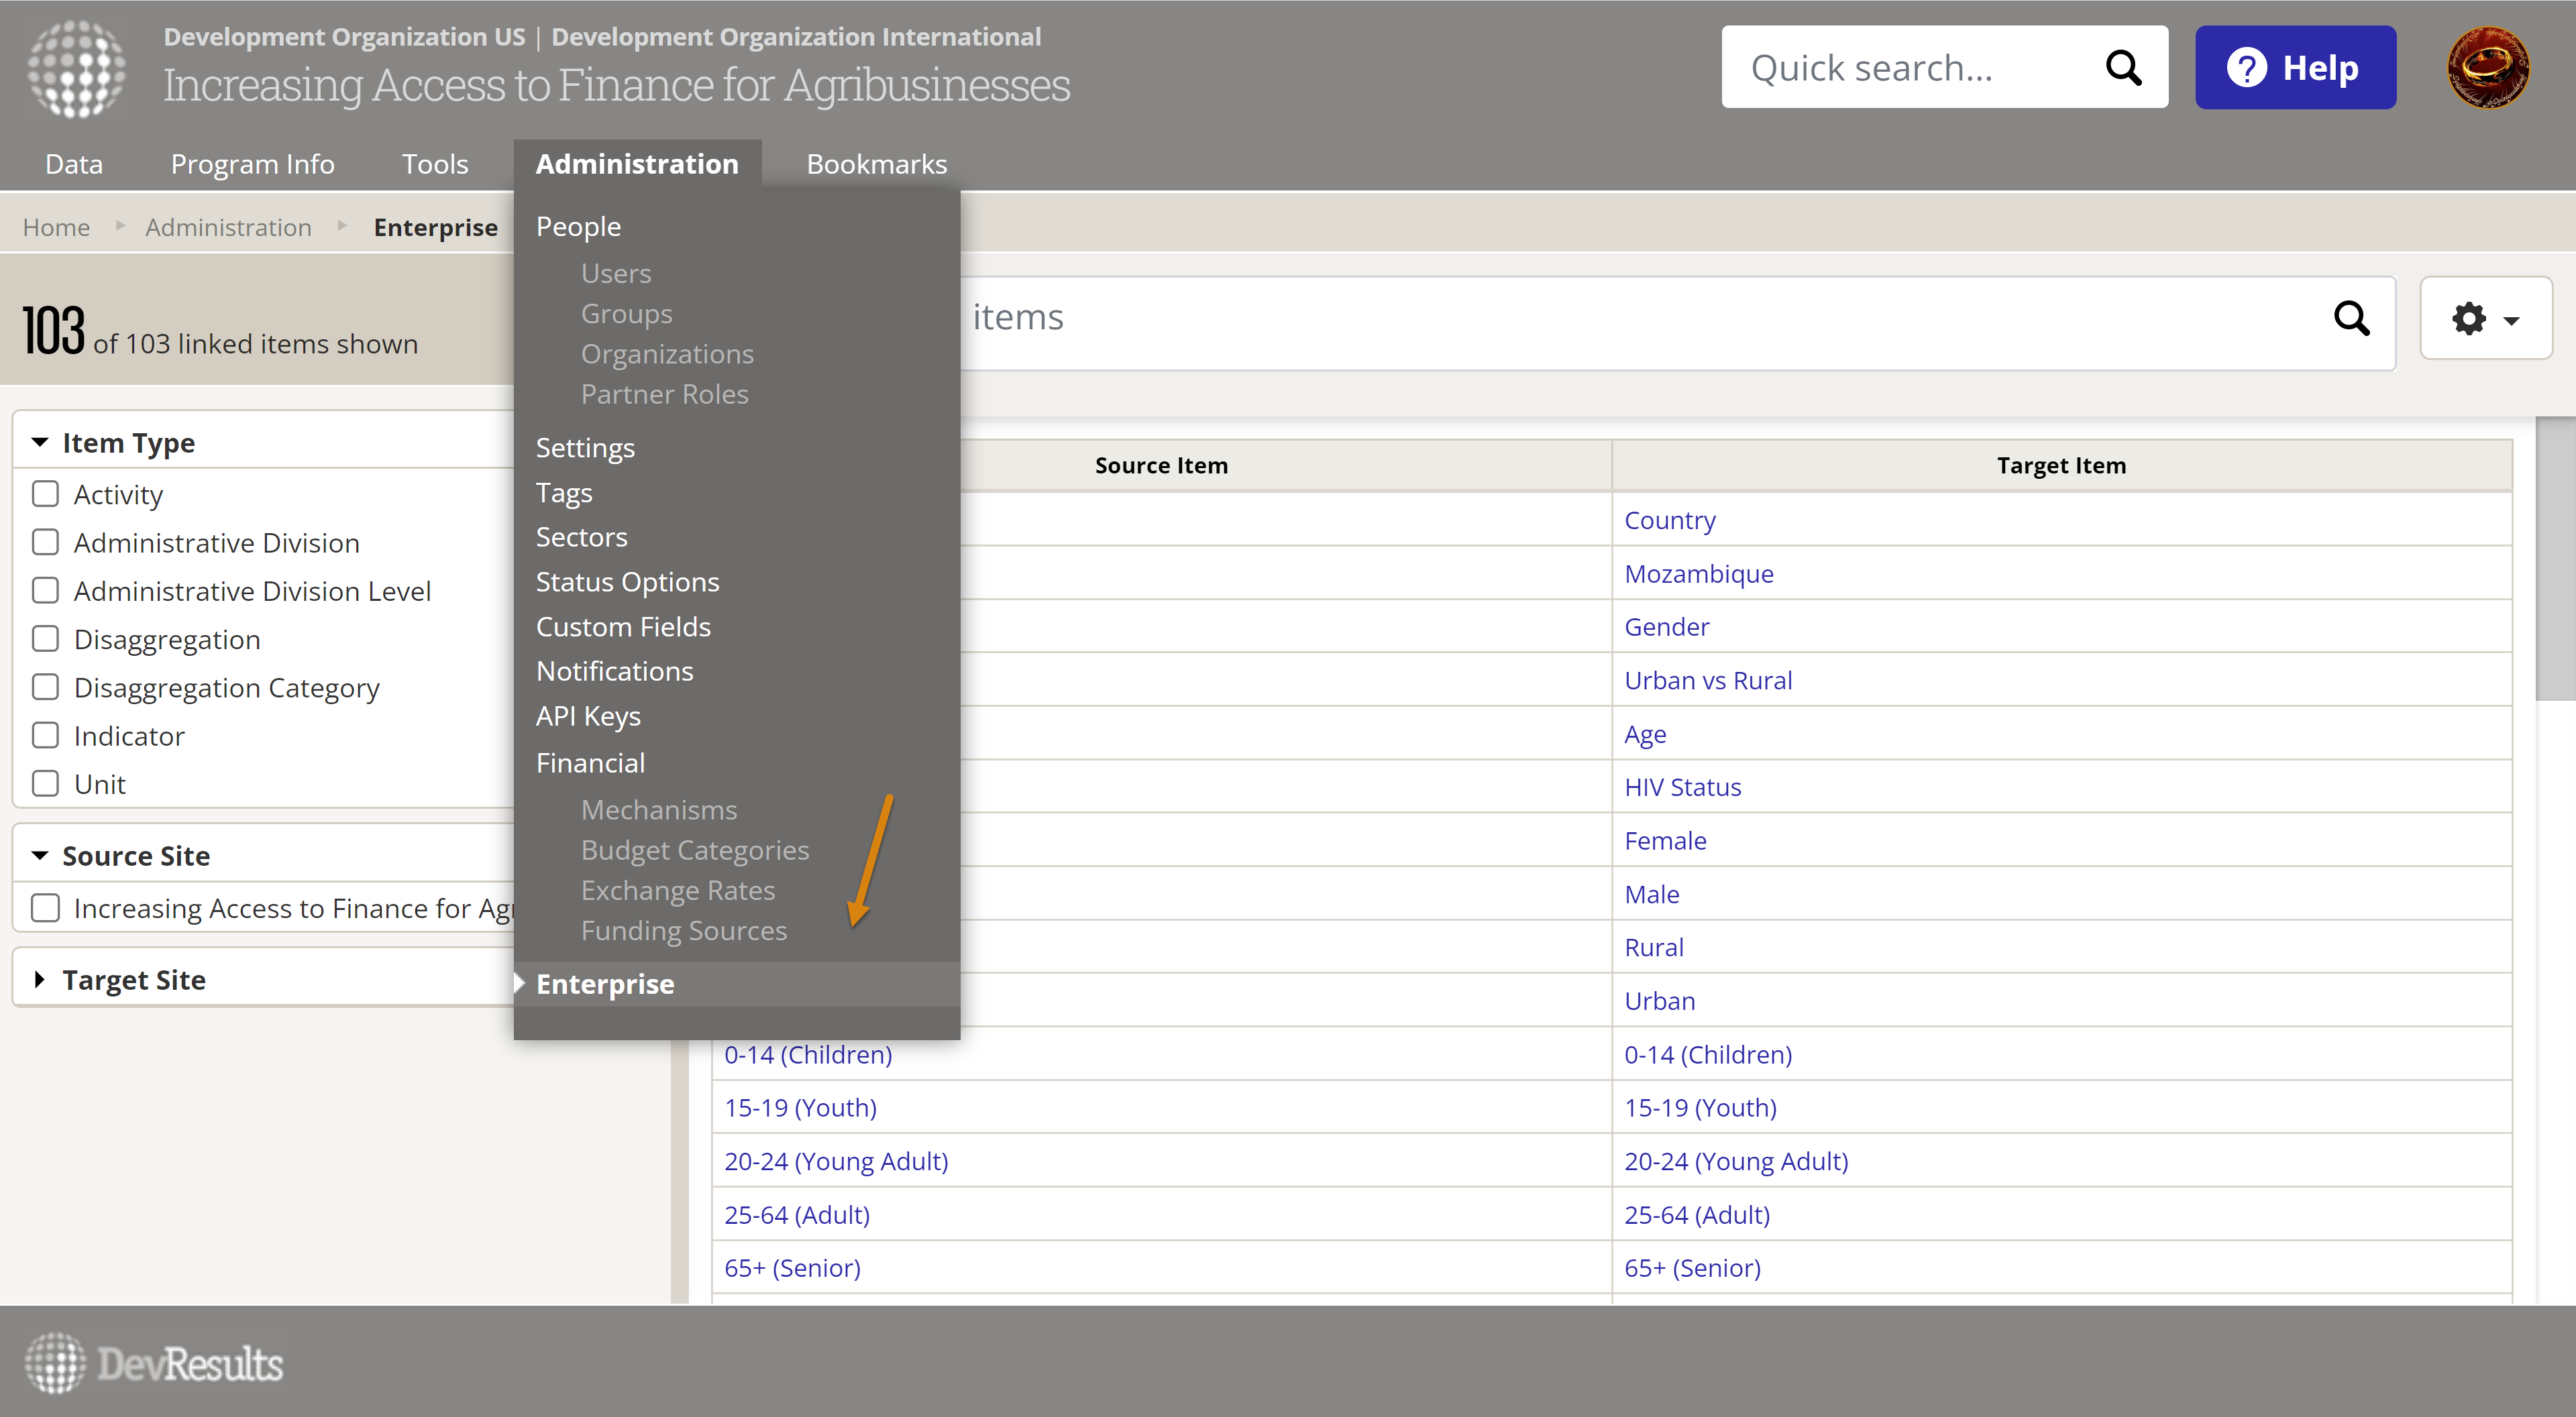
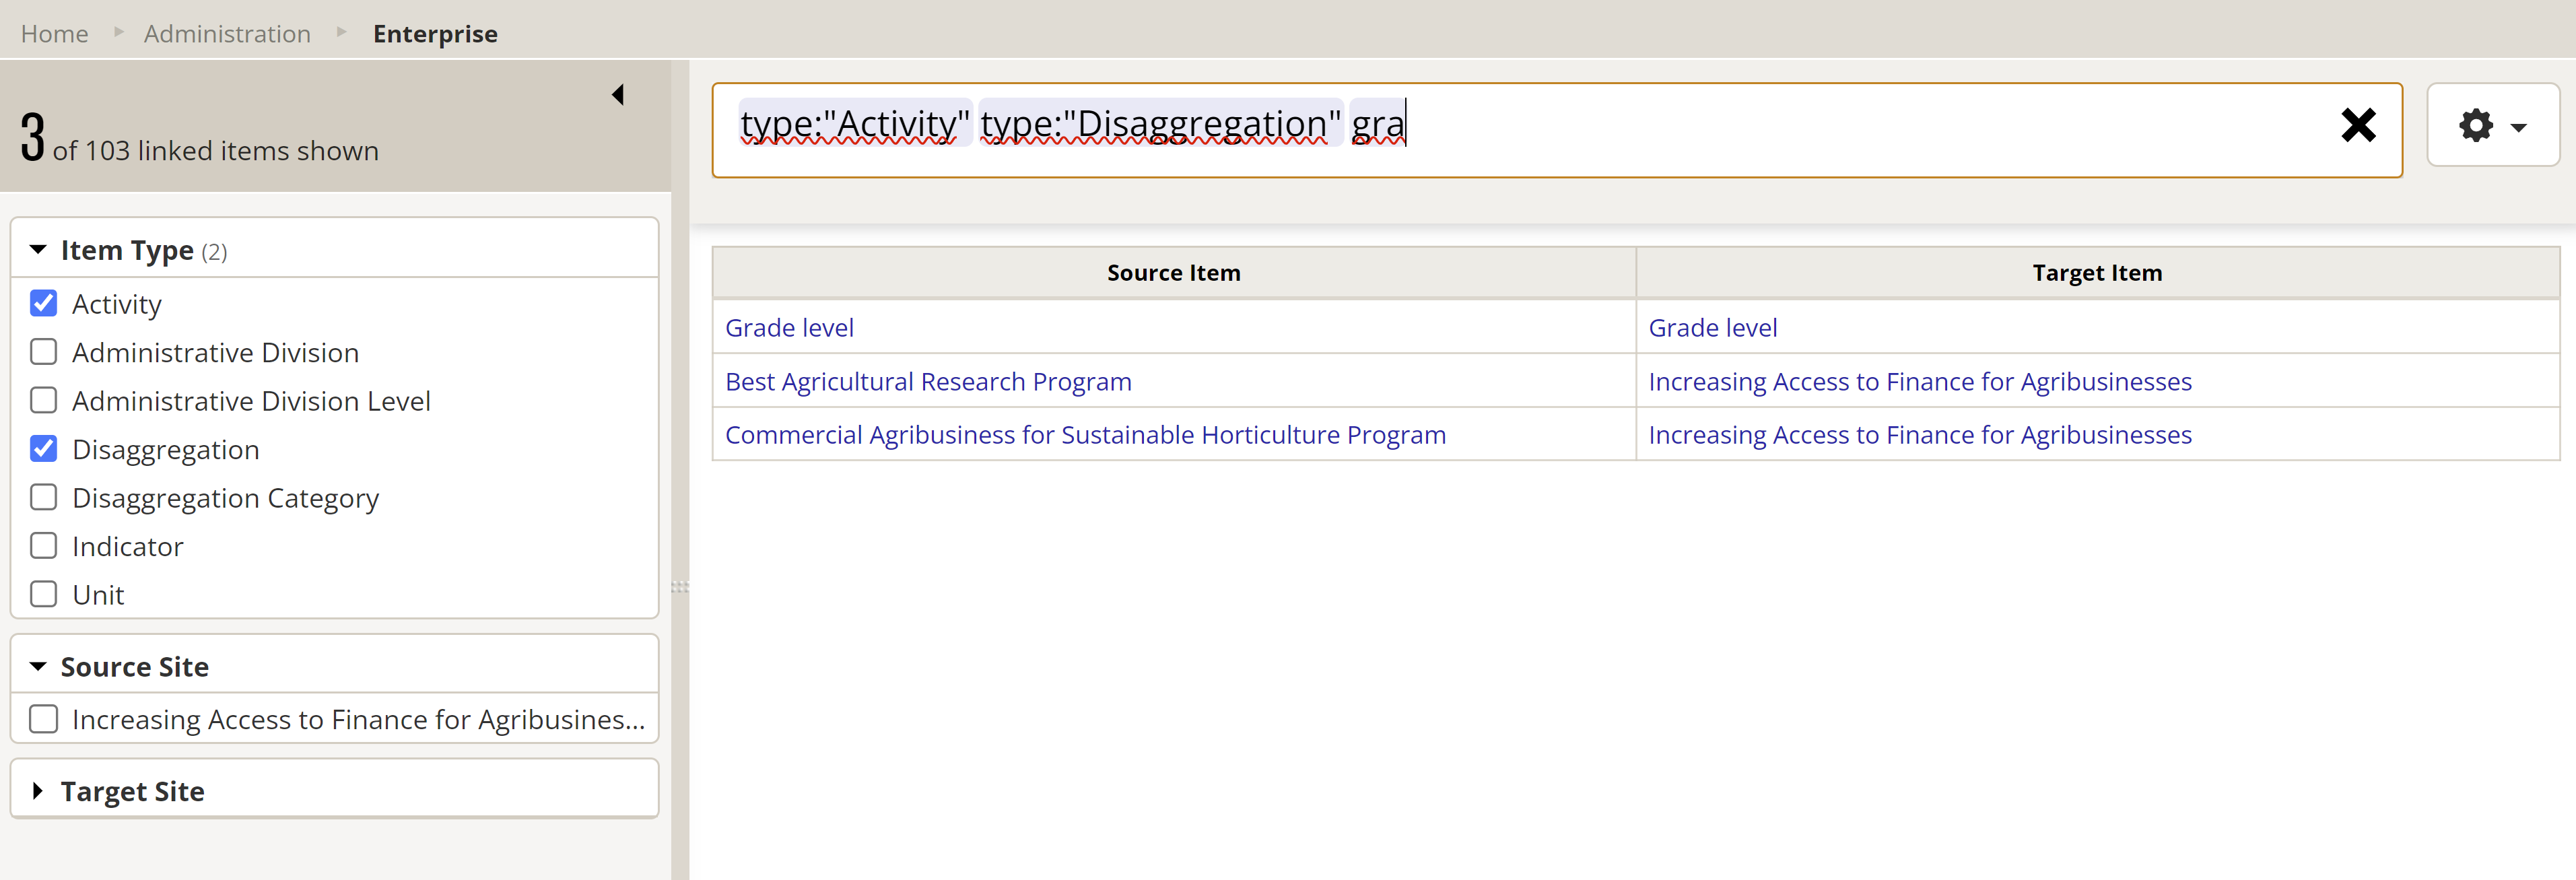
You can sort, filter, and search for specific items in the list using either the left-hand side filter or the search bar.
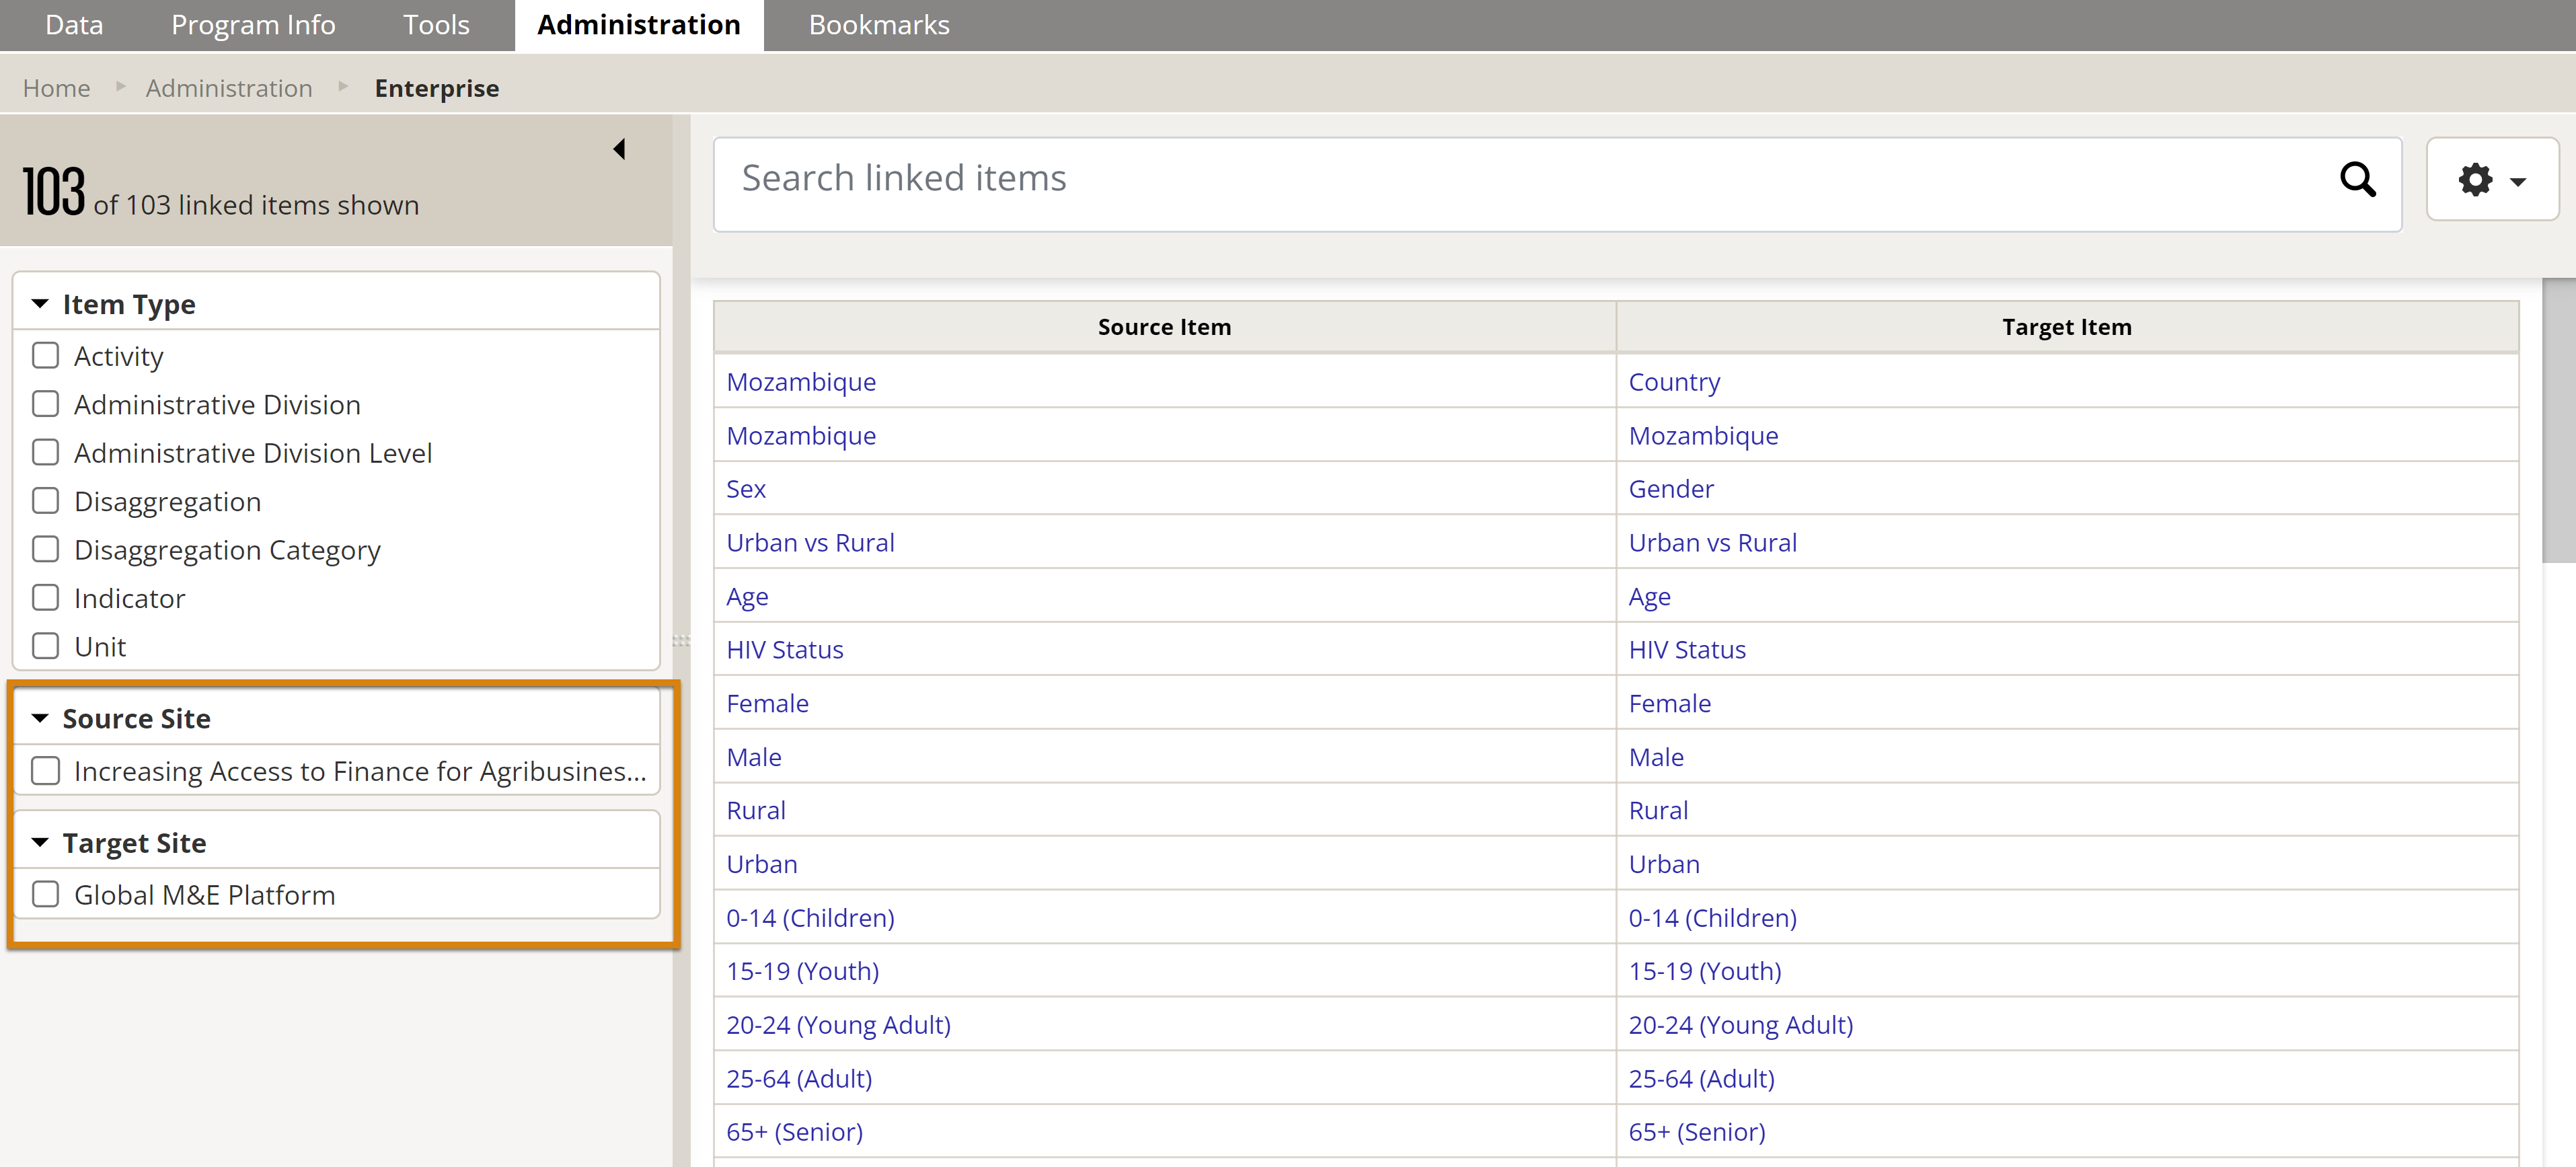
If you are linked to multiple sites, you can also filter by either the source or target site.
NOTE: If you see "Unknown" under a target item, it's either because you do not have permissions on the target site to see that item, or a result of a deleted link. Reach out to us at help@devresults.com to help investigate the issue.
Link Administrative Division Levels
To begin with, link the administrative division levels.
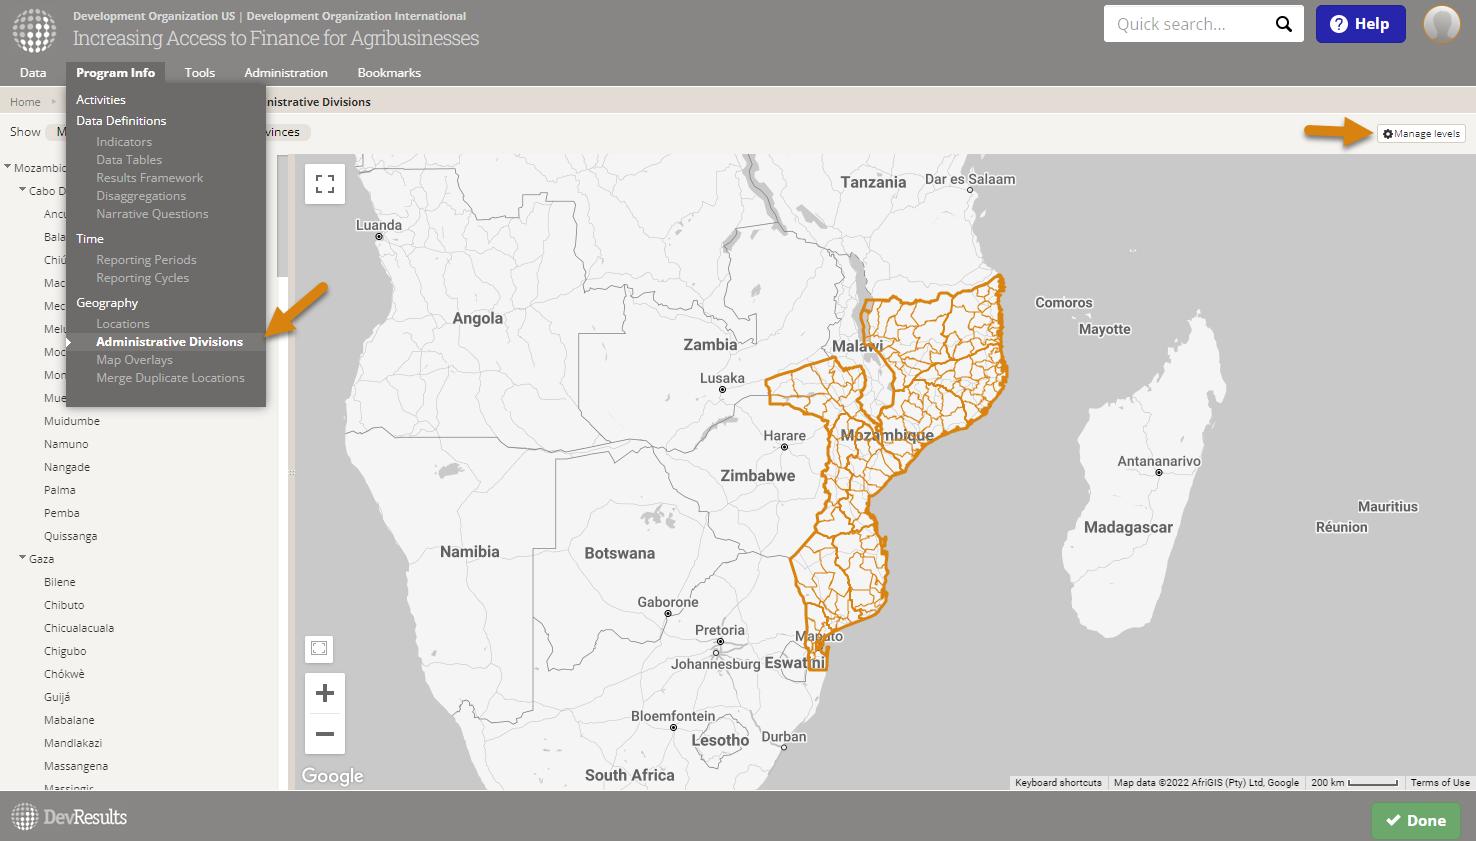
Go to Program Info > Administrative Divisions. Then click on Manage levels in the upper right corner.
Click the number in the Linked Levels columns for each level you want to link. This will open a pop-up to view/edit the linked levels.

Select the site you wish to link to and the level in that site to link to. Click Done once you've finished making selections.
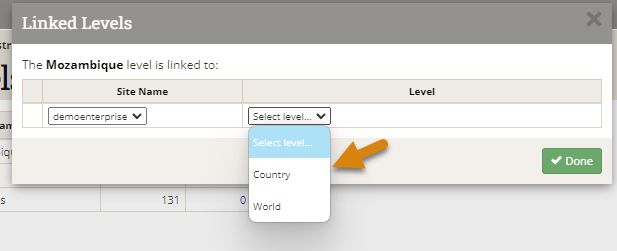
Repeat these linking steps for each level you need to link. Please note that admin division level links are "one to one" between sites.
Link Administrative Divisions
For every Administrative Division Level you linked, you'll need to link at least one Administrative Division.
Go to Program Info > Administrative Divisions.
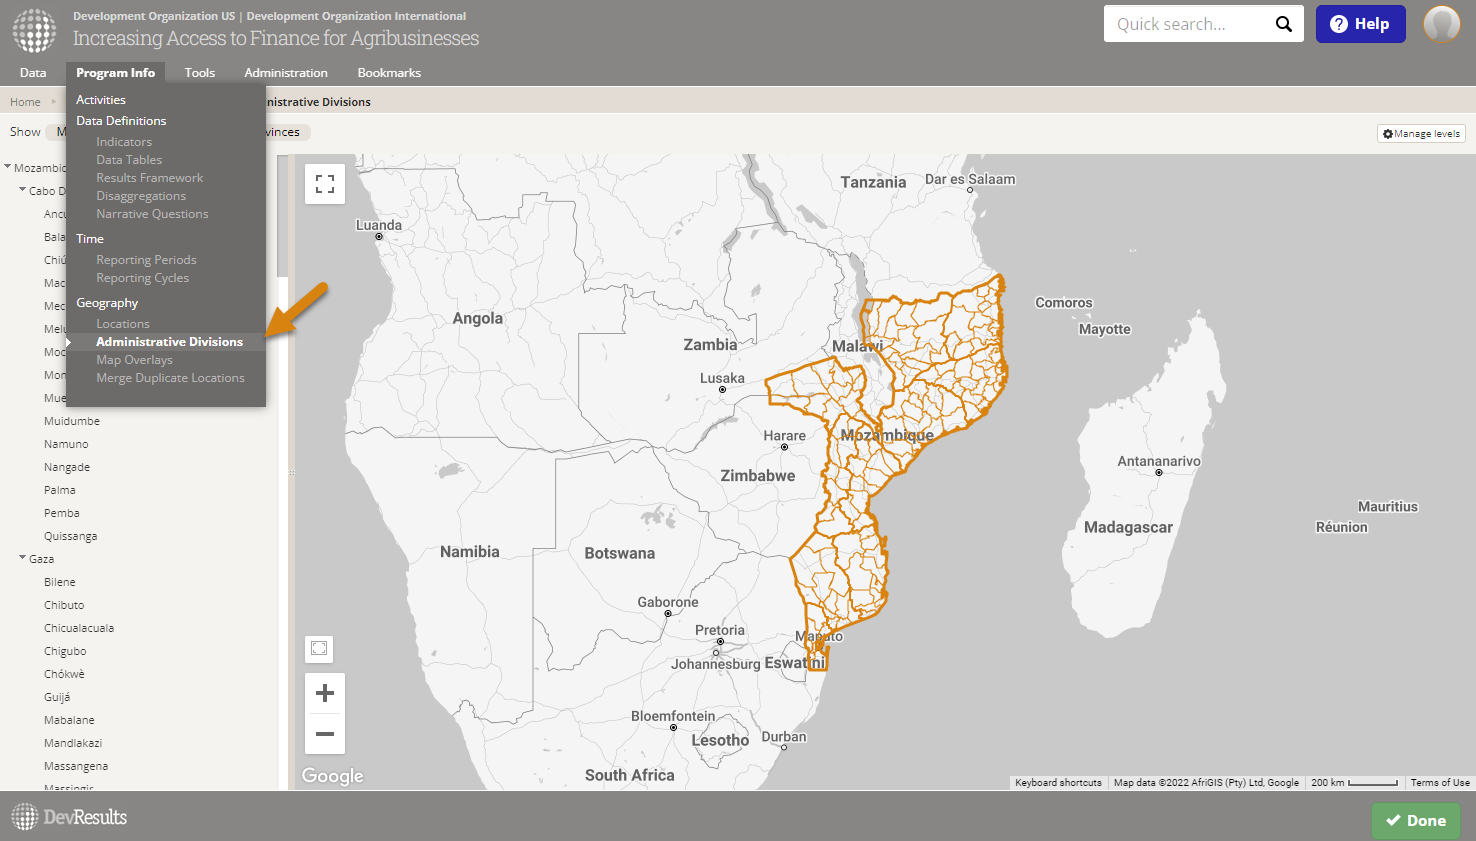
Select the administrative division you want to link and click the Edit button.
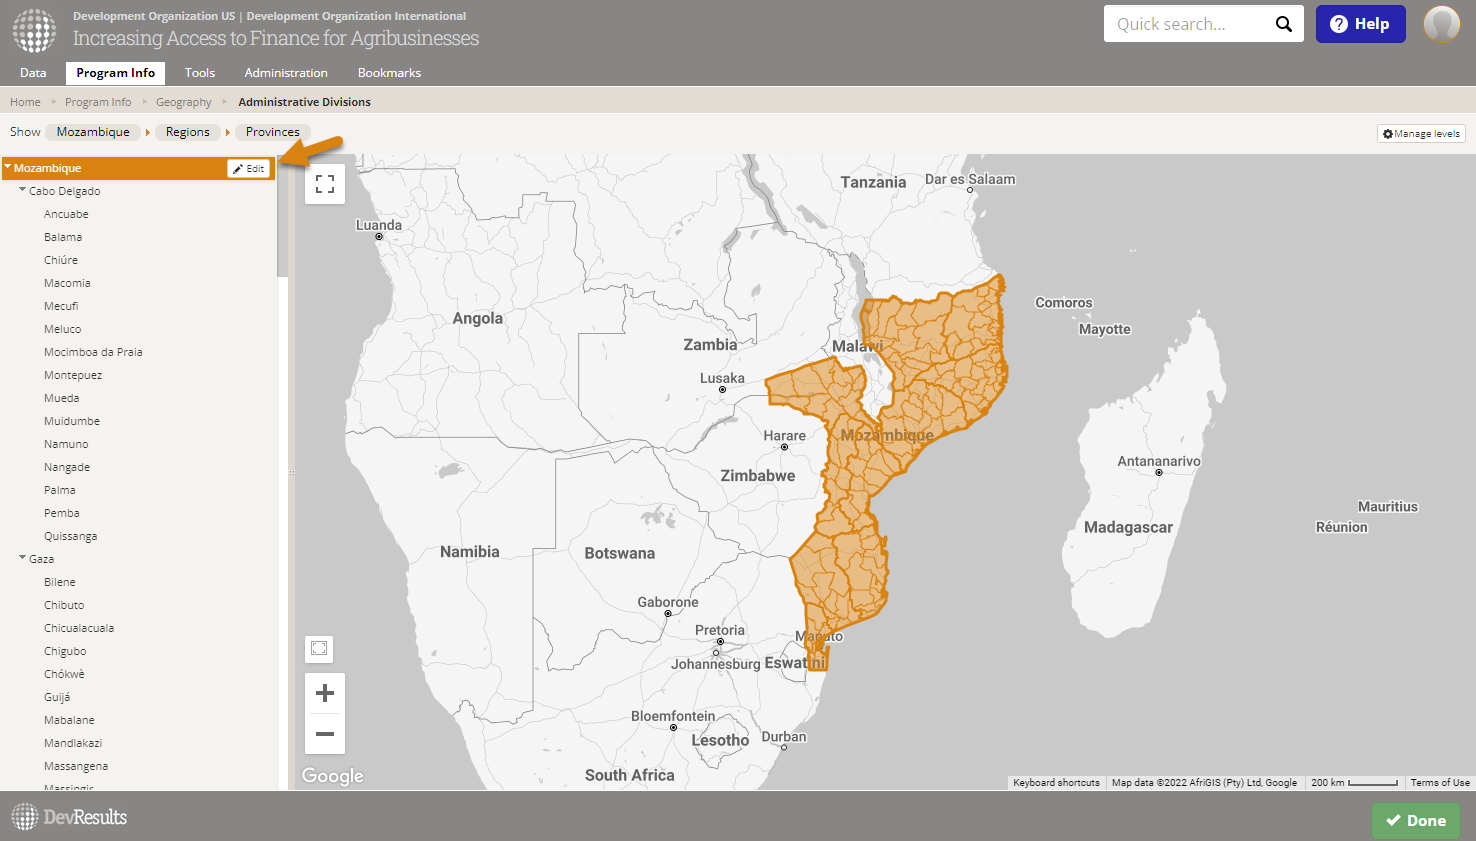
This will open the Administrative Division's Details page. Click the (+) Add linked administrative division... button.

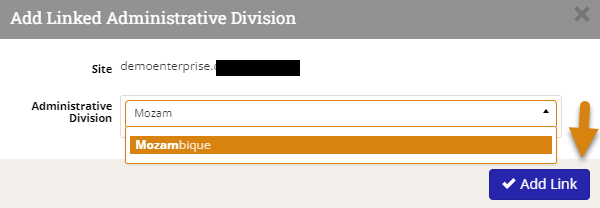
This will open a pop-up to select a linked site and Administrative Division to link to. If your site is only linked to one other site, we'll autoselect it for you. If your site is linked to multiple other sites, you'll see a dropdown at the top so you can pick the site to link to.
Use the Administrative Division dropdown to make your selection. You can start typing the name of the Administrative Division to filter the dropdown list.
Once you've selected both the linked site and the Administrative Division to link to, click the Add Link button to complete the linking.
The Linked Administrative Divisions section will update to reflect the changes you made.

To publish data between locations, you will need to link locations to one another. Go to Program Info > Locations and select the location you want to link.
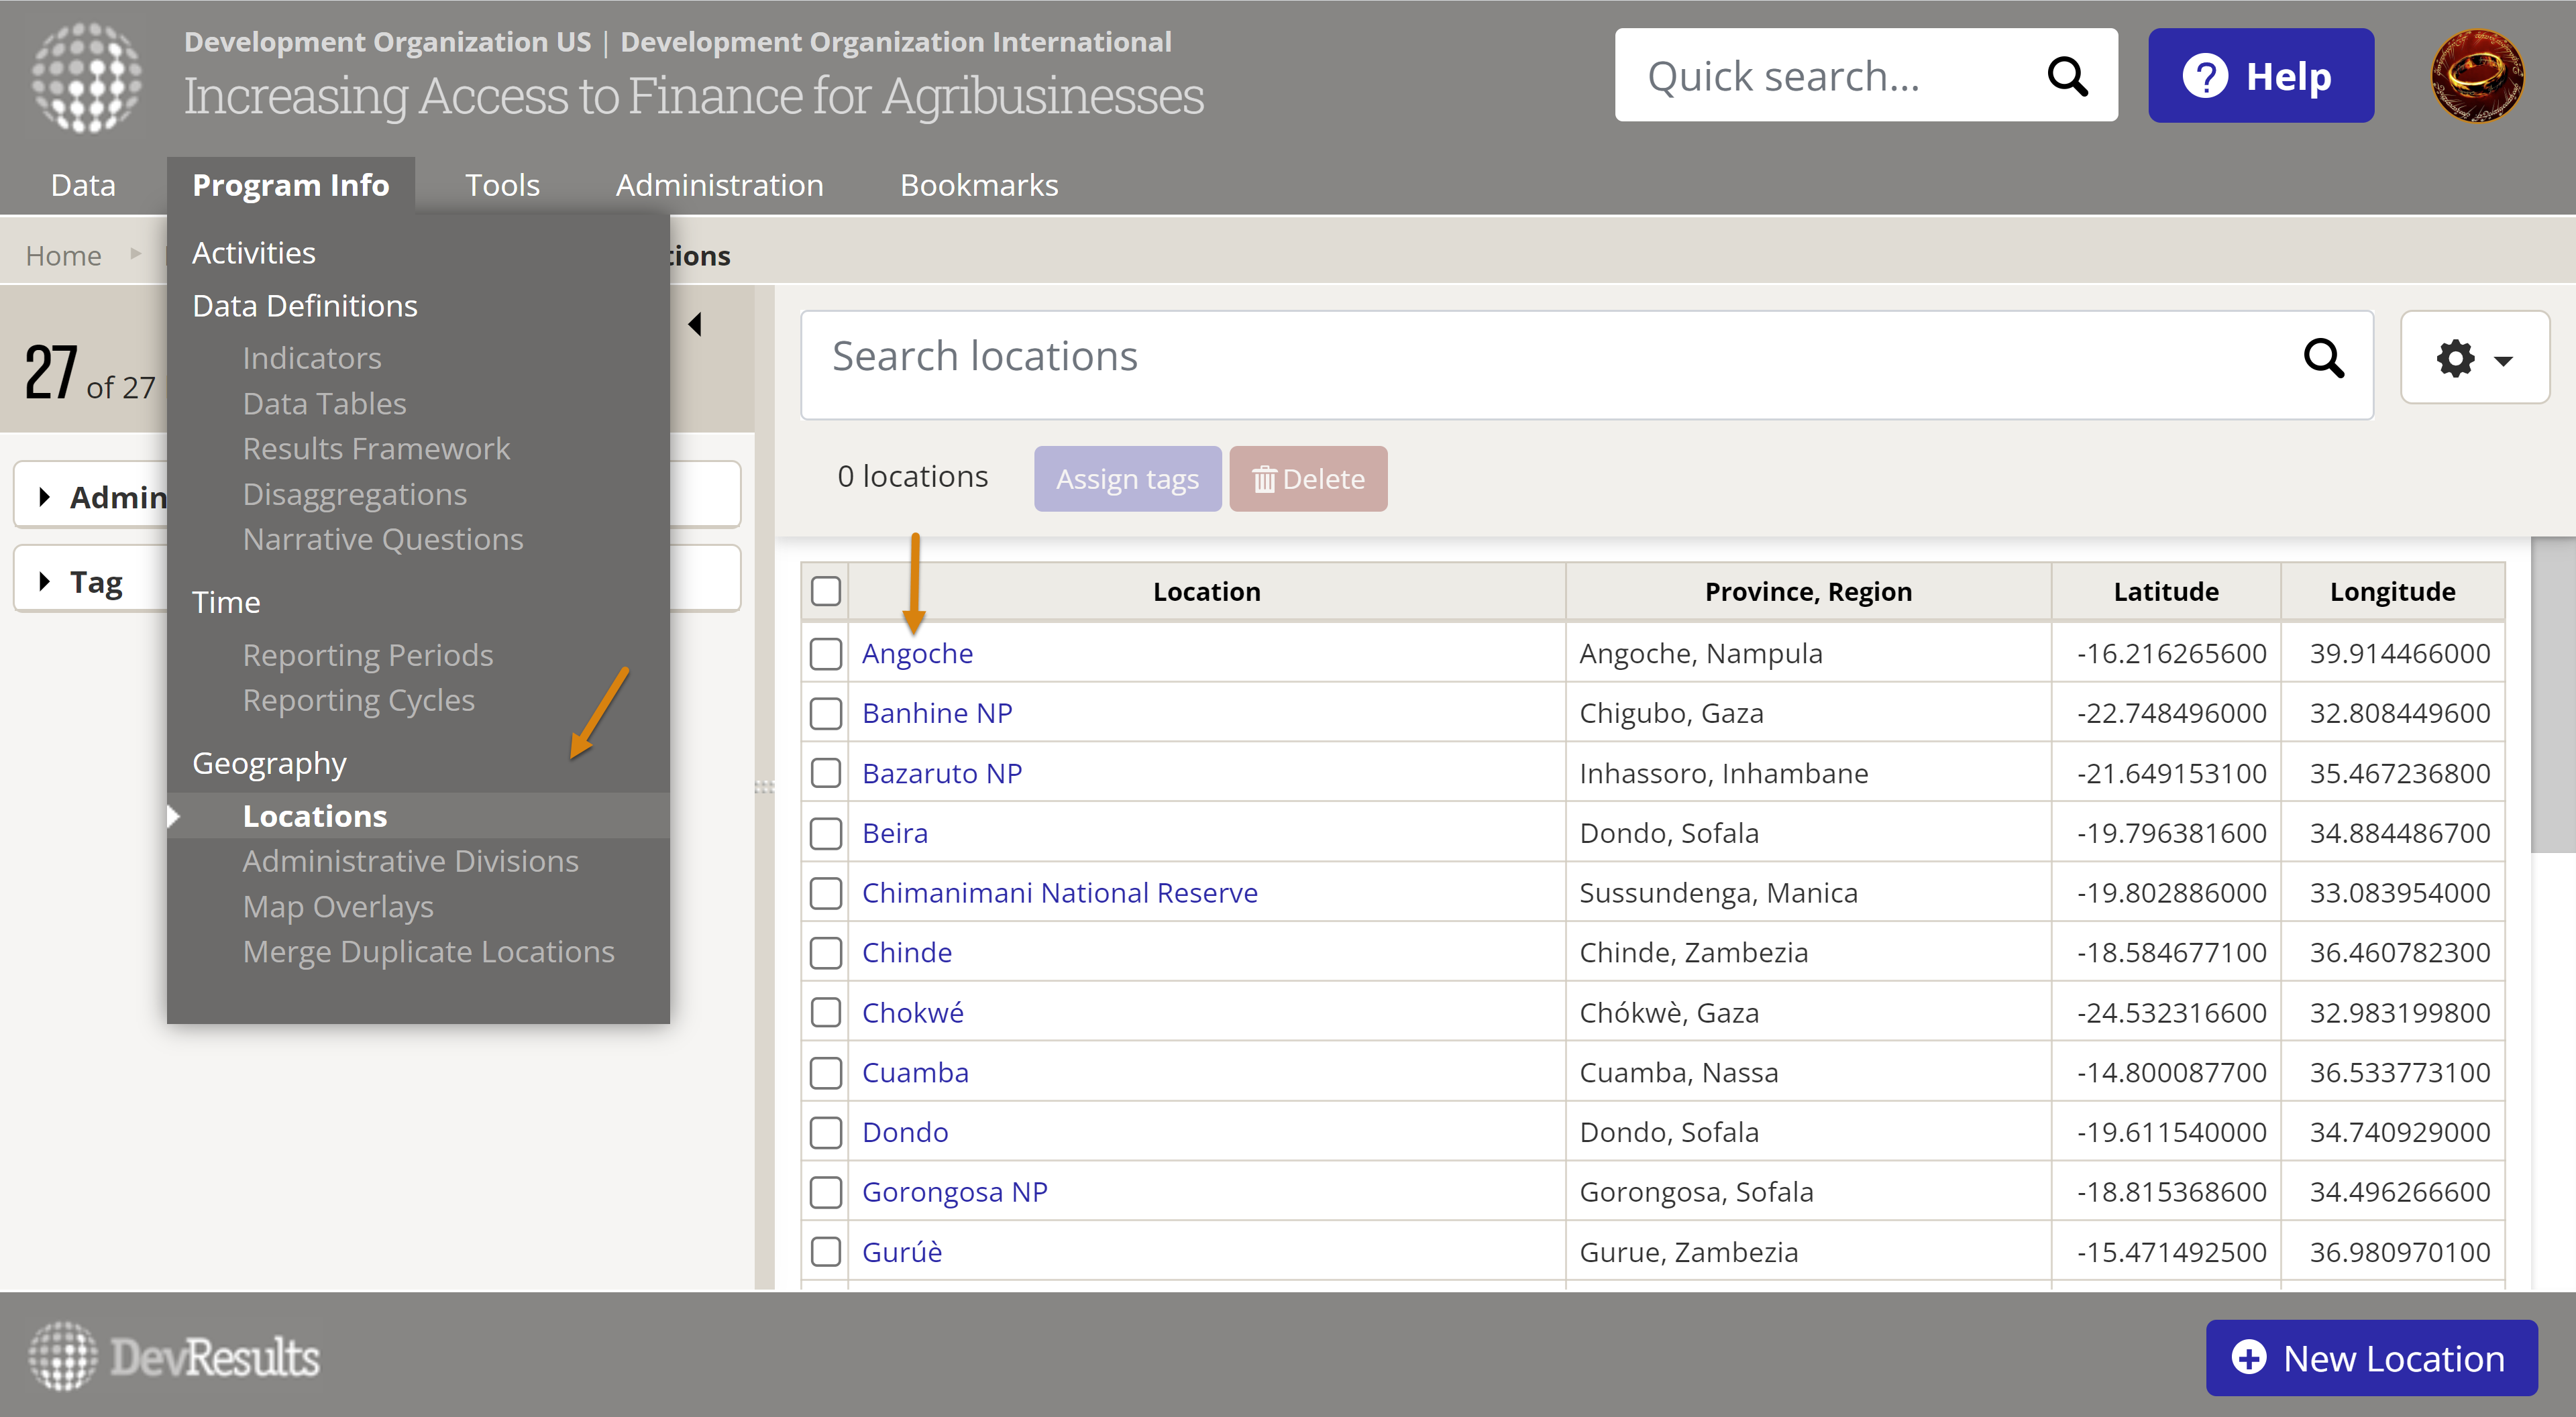
Click the + Add linked location... button

This will open a pop-up to select a linked site and location to link to. If your site is only linked to one other site, we'll autoselect it for you. If your site is linked to multiple other sites, you'll see a dropdown at the top so you can pick the site to link to.
Use the location dropdown to make your selection. You can start typing the name of the location to filter the dropdown list.
Once you've selected both the linked site and the location to link to, click the Add Link button to complete the linking.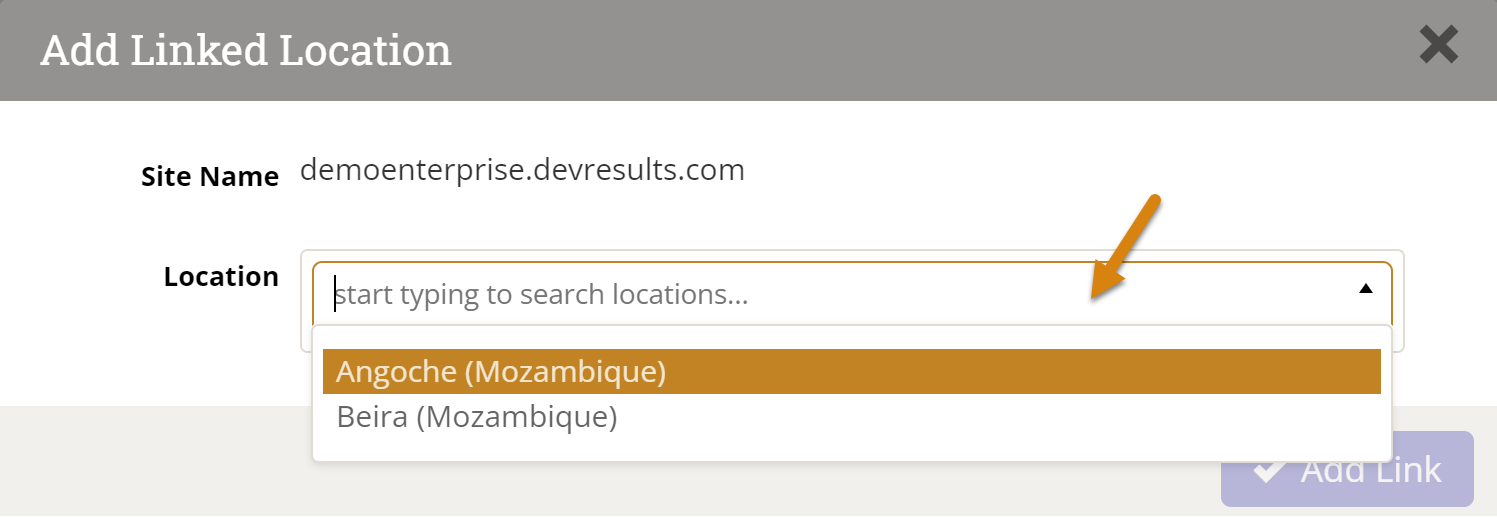
Please note that both locations and admin divisions can be mapped "one to one" or "many to one" if multiple areas in a site are to be aggregated and published to a single area in a target site.
Indicators
To publish data between sites, you will need to link the indicators to one another. You can either use the Indicator Library for this, or do so manually.
To link indicators manually, go to Program Info > Indicators

Search or filter the indicator index and select the indicator you want to link.

Click the (+) Add linked indicator... button
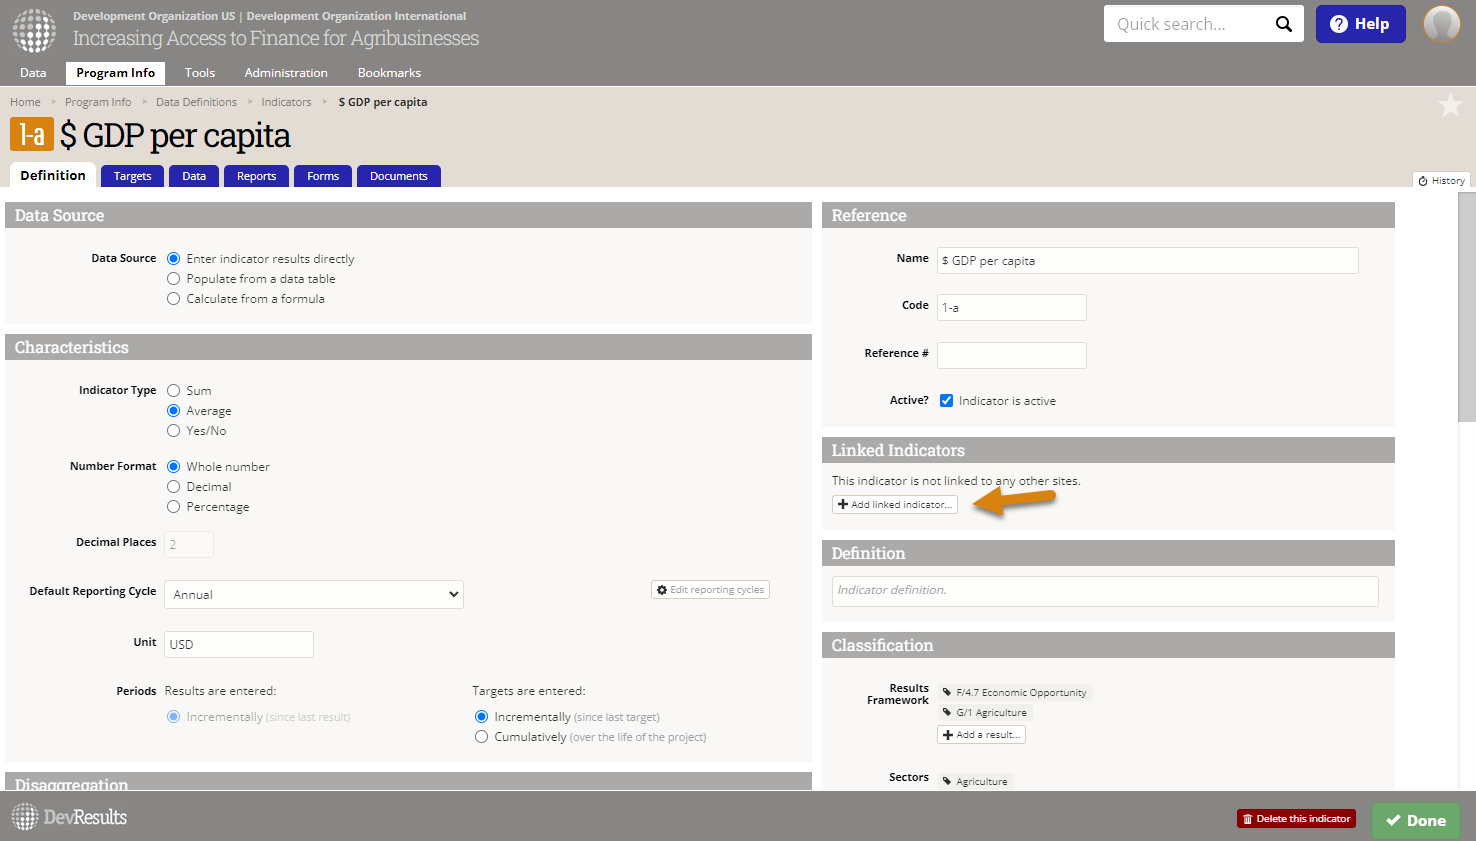
Filter the list of indicators to find the corresponding indicator on the enterprise site and then click Add Link.

Please note that indicator links are "one to one" between sites.
Link Disaggregations & Disaggregation Categories
To link the disaggregations of the indicators you're publishing, go to Program Info > Disaggregations
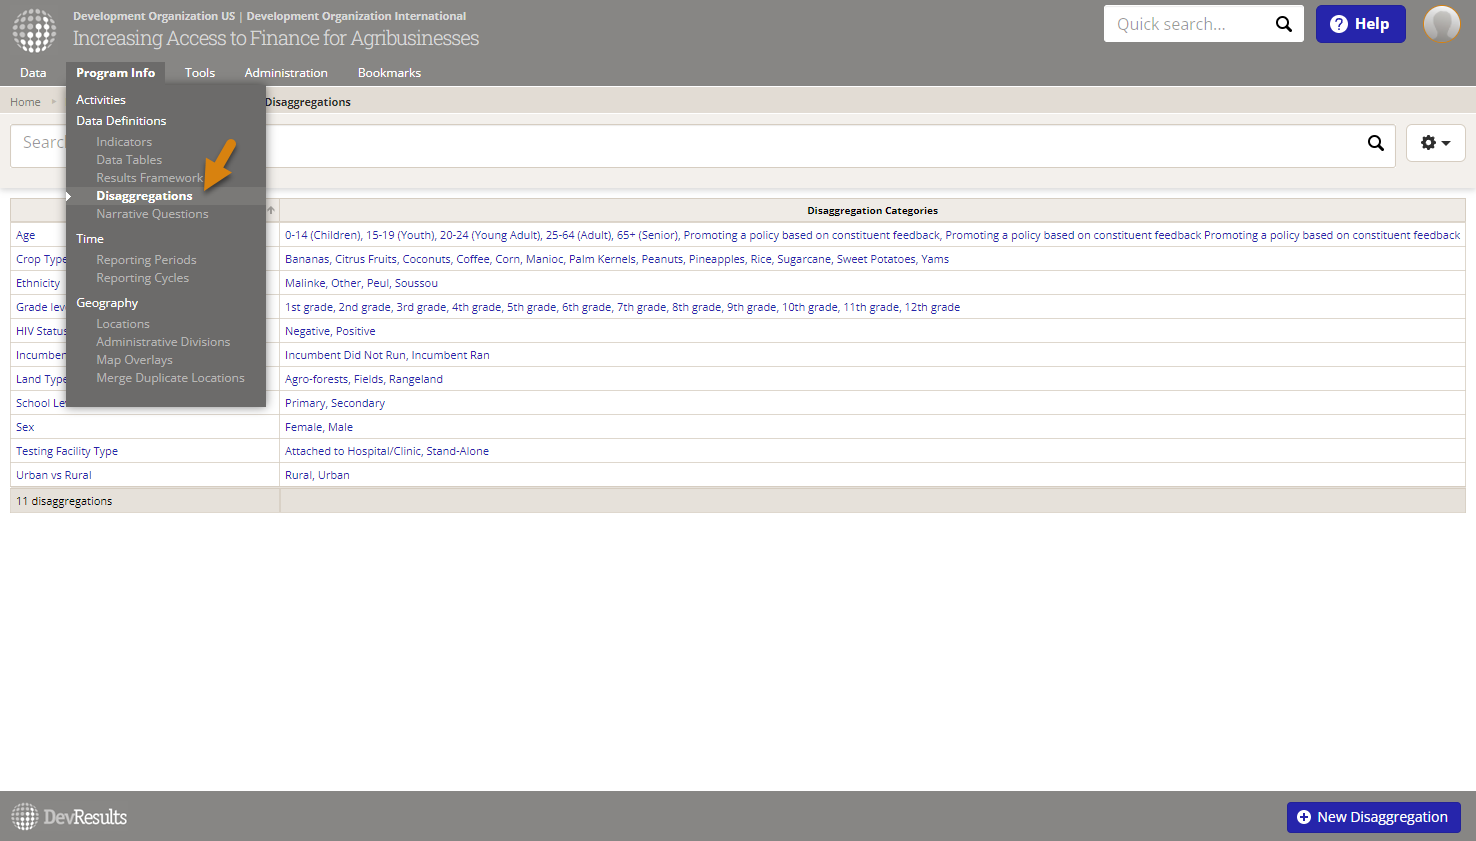
Click on the disaggregation you want to link and click the (+) Add linked disaggregation... button.
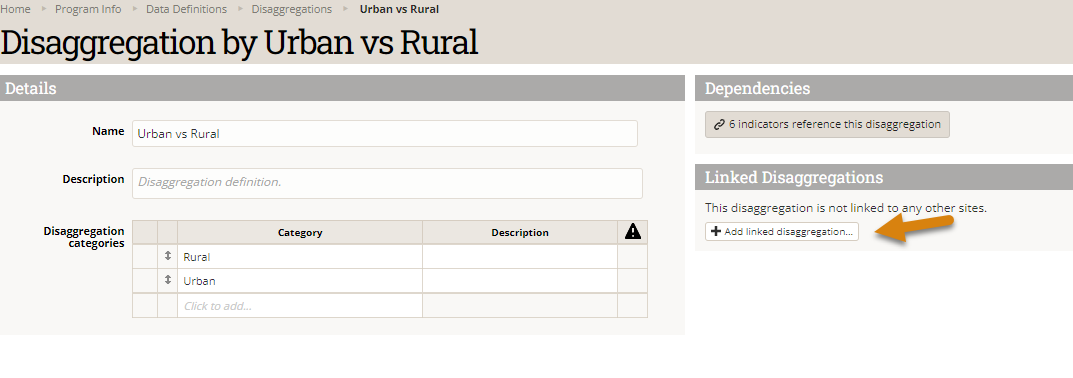
Link the disaggregations together and click Add Link.

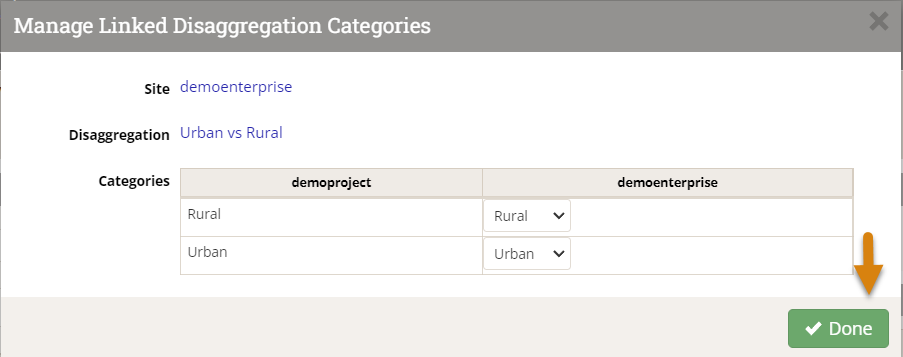
Next, you will be taken to a modal to link the two disaggregation categories. Select the categories from the dropdown menus and then click Done.
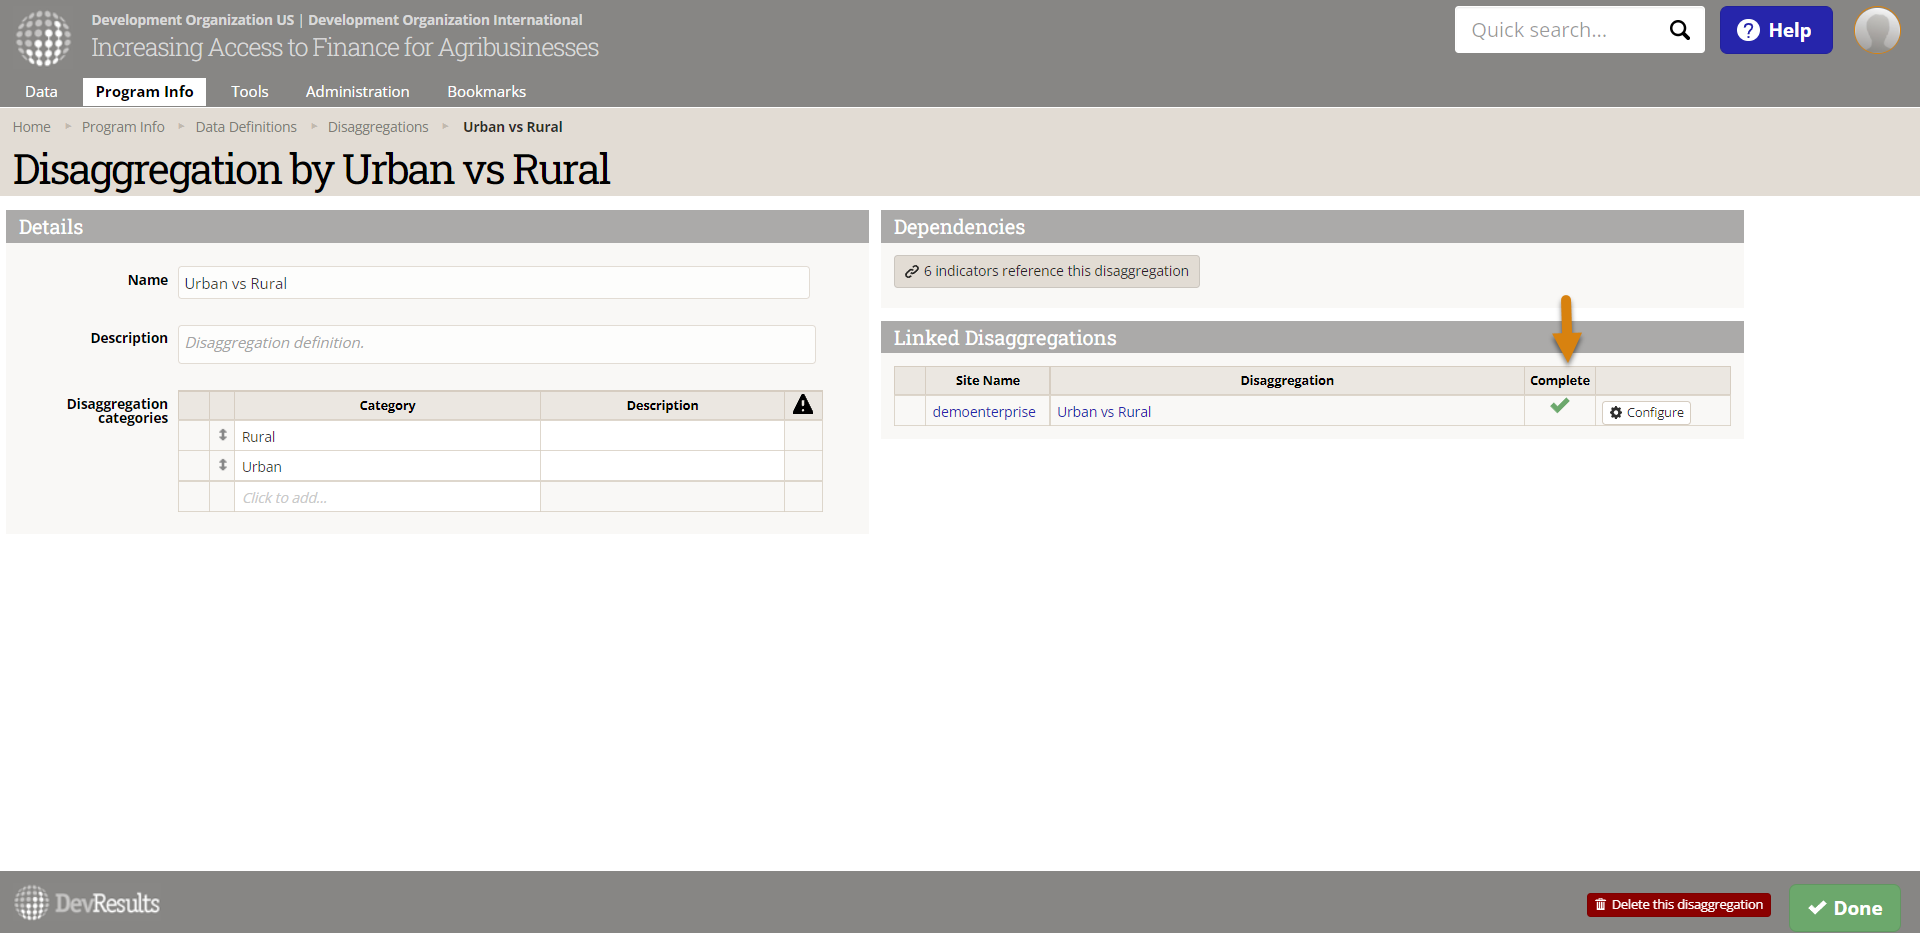
The disaggregation details page will update to show this link in the linked disaggregations section. If you've successfully linked all disaggregations, the "complete" column will have a green checkmark. If not, click the configure button to complete linking.
You may still run into issues while trying to publish indicator results. DevResults will send you detailed emails about why a publication may have failed. However, if you find that you're still having issues please email us at help@devresults.com.
Didn't answer your question? Please email us at help@devresults.com.