There are two ways to enter data into data tables:
- Entering data online
- Uploading a spreadsheet containing all your rows of data (as shown on this page)
Mix and match data entry: You can use a combination of entering data online or uploading a spreadsheet. For example, you might upload a spreadsheet for the bulk of your data, and then add a couple individual rows online or edit the entered rows online. You can download a copy of the table into Excel at any time to use as a template for future uploads. Unlike project reporting, data table rows can be entered at any time, regardless of set reporting period submission periods.
Spreadsheet Tips
Before you upload a spreadsheet containing data, here are a few quick tips to get you started:
- Your Excel spreadsheet should have columns for every column in the data table. It can have more columns than are in the data table (the system will ignore the extras), but it should not have less.
- While your Excel spreadsheet column headers can be anything, the import will go faster if your spreadsheet's column headers match the data table column headers.
- DevResults provides you with data table templates that you can download and fill with new information.
- Be sure your Excel spreadsheet is saved in a location that you can easily access before you begin the upload process.
- Records uploaded from Excel will appear in the data table in the exact order they appear in the spreadsheet.
Upload Steps
1) Log into DevResults. Your website will be something.devresults.com.
- Forgot your password? Get a new password.
- Does the site not recognize your email? Talk to your contacts to whom you report data. DevResults staff cannot give partners access to the system.
2) When you log in, you will be taken to your Partner Dashboard. The top right has a tile with a card for each of the projects you have access to. Each project card has a link to any associated data tables.

3) Click the Data Tables button for the project that you wish to enter data for.
4) Next, use the data table dropdown to select a table to enter data for.

Importing New Data
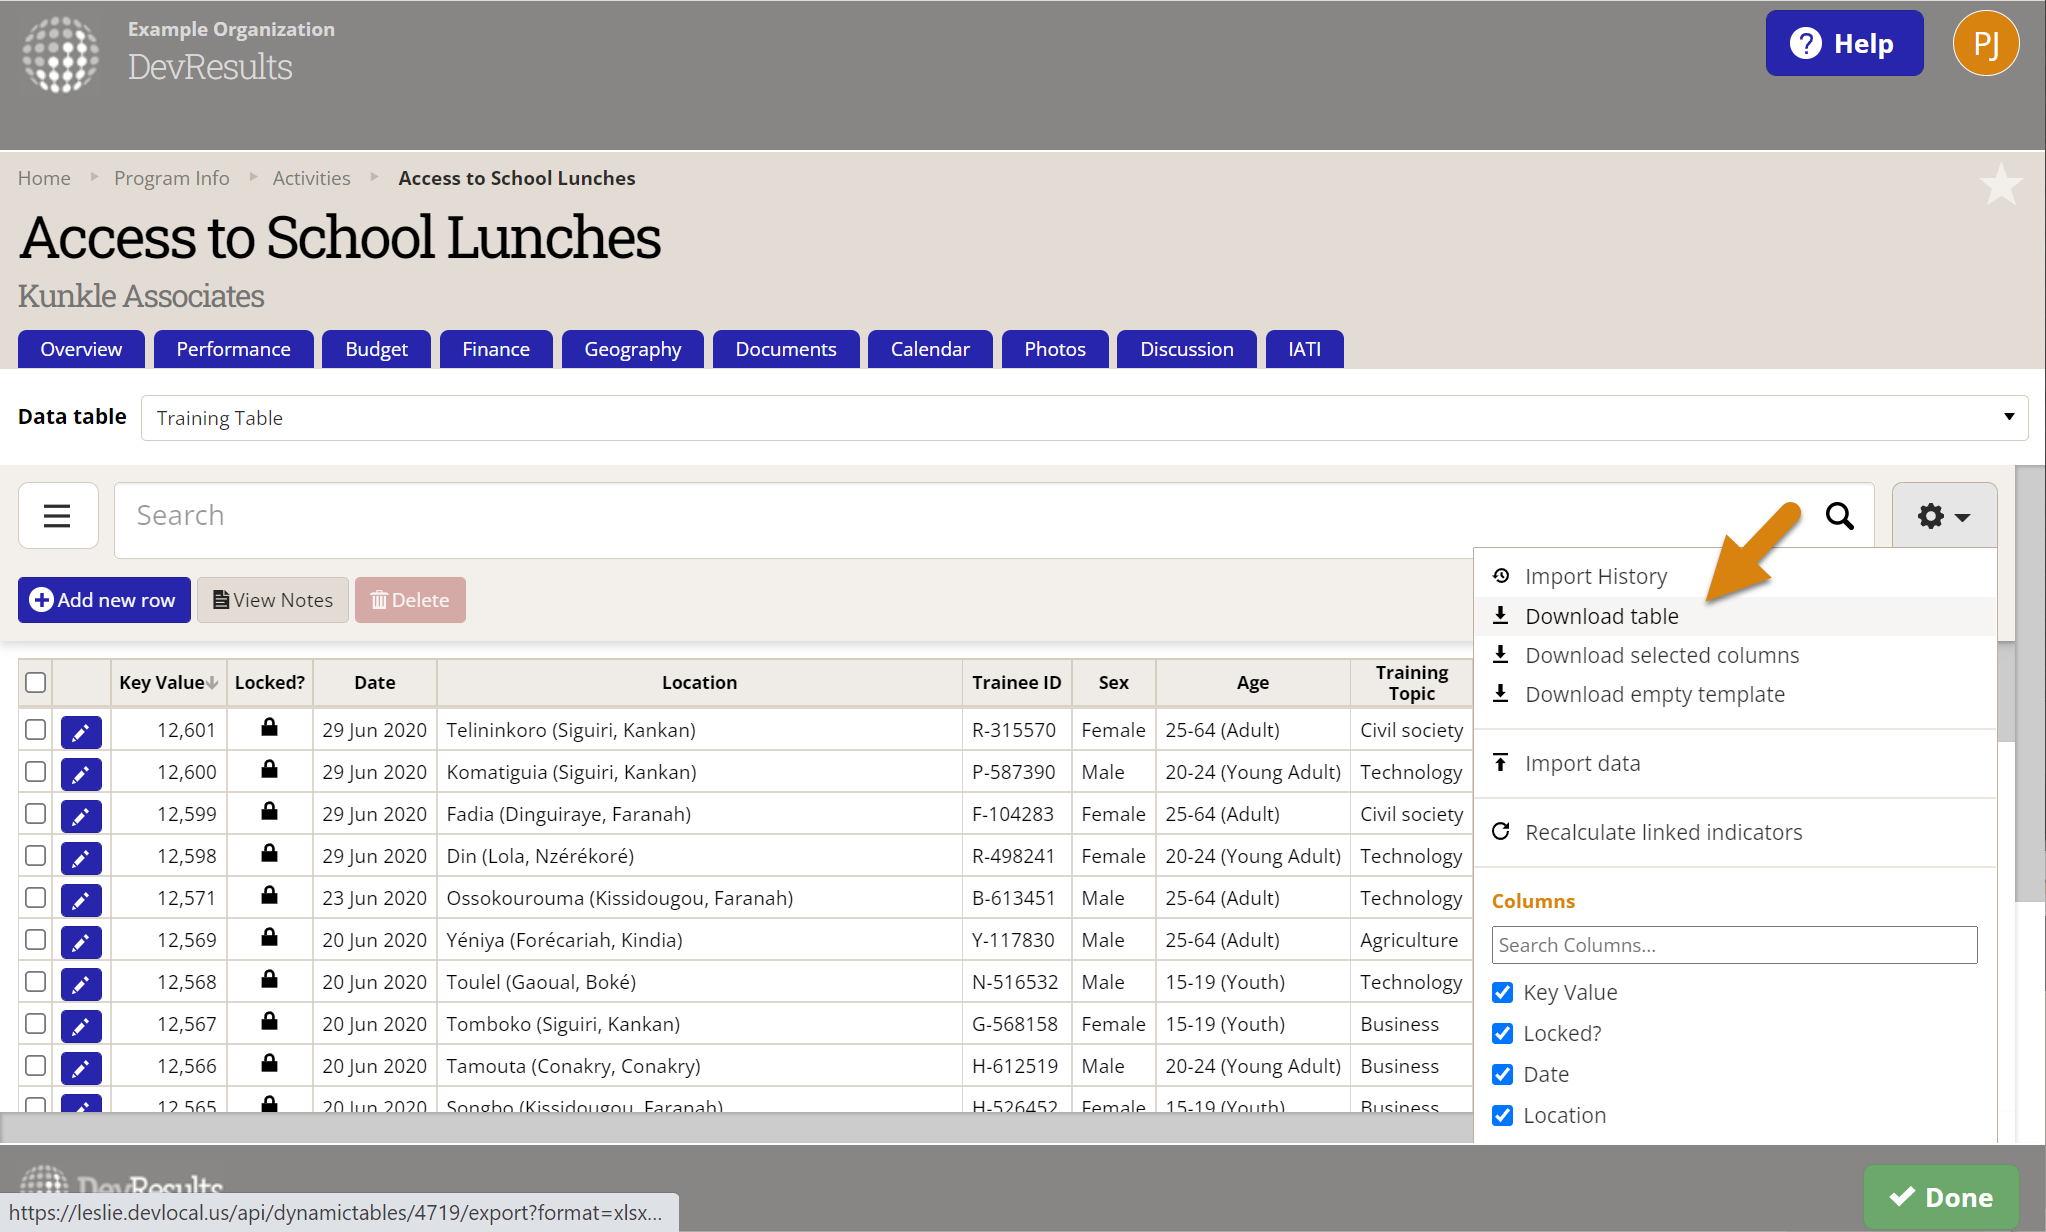
To upload a spreadsheet with data, click the gear icon button to the upper right of the table. To add new rows, download an empty template by clicking on Download empty template.

Enter data into the empty template.

To import the completed rows into DevResults, click on Import data.

Click on Choose file. Browse to the file you created earlier and select it. If you have a multi-sheet Excel file, select the sheet you want to upload.
The system will try to map the columns in your spreadsheet to the columns in the data table--if you used the same column headings, it should do this flawlessly. If you named the columns something else, select the correct column title from the dropdown of column names. If you don't want to import a column, you can uncheck the Import field option. Review the settings here to make sure they match properly. When everything is matched properly, click Import data.

Updating Existing Data
To make updates to existing rows, select Download table from the gear icon.

If you are updating information, do not modify the Key Value. This value is assigned by DevResults and identifies the row to be updated.
Once you've made the changes to your Excel spreadsheet, select Import data from the gar icon, select the Excel fil from your computer, and click the Import data button in the lower right-hand corner of the Upload Data pop-up.
To review the rows changed in the spreadsheet we imported, click on the gear icon and select Import History. You can then download the spreadsheet you want to review.
Didn't answer your question? Please email us at help@devresults.com.