DevResults offers two multi-purpose tools for organizing, sorting, and filtering information: tags and sectors defined by users.
- Tags enable users to filter projects, data tables, indicators, locations, organizations, and photos (as well as indicator data).
- Sectors enable users to filter indicators and projects (as well as indicator data).
"Tags" and "Sectors" are default terms in DevResults, but you could rename them to something else that matches the terminology in your organization, like "Themes" and "Focus Areas". To do so, please reach out to our Help Desk at help@devresults.com.
On this page:
- Create a tag
- Create or edit multiple tags using an Excel import
- Assign a tag
- Use tags to filter information
- Create a sector
- Assign a sector
- Use sectors to filter information
Create a tag
To create a new tag, go to Administration > Tags.

Choose from the blue tabs to create a tag for projects, data tables, indicators, locations, organizations, or photos. Click on the grey Click to add... text at the bottom of the table and type the name of your new tag. Click anywhere outside of the cell to save the tag.

To edit an existing tag, click on the tag text, edit it, and click anywhere outside of the cell to save the change.
To delete a tag, hover over the tag and click on the orange X that appears to its left.
Create or edit multiple tags using an Excel import
Tags in DevResults can be added or edited by uploading an Excel file. There are multiple template options:
Single tag type
On the Administration > Tags page, you can download templates for editing or adding tags for a specific part of the site, like project tags or indicator tags.

Downloading a blank template will give you a single column for adding new tags.
Exporting all will give you a template with an ID number for each tag. To edit an existing tag, change the text but not the ID. Here, we're changing Children to Children and Youth. All projects tagged with Children will be updated to Children and Youth as well.
In the same template, you can also add a new tag by adding a row and leaving the ID blank. Never add an ID yourself; these are created by the system. (If you do, the system will think you're trying to update whatever tag already has that ID.) Here, Agriculture will be added as a new project tag.

Once you've completed a template and saved it, import it to the same page by clicking on the Import option in the gear menu and following the prompts.
All tag types
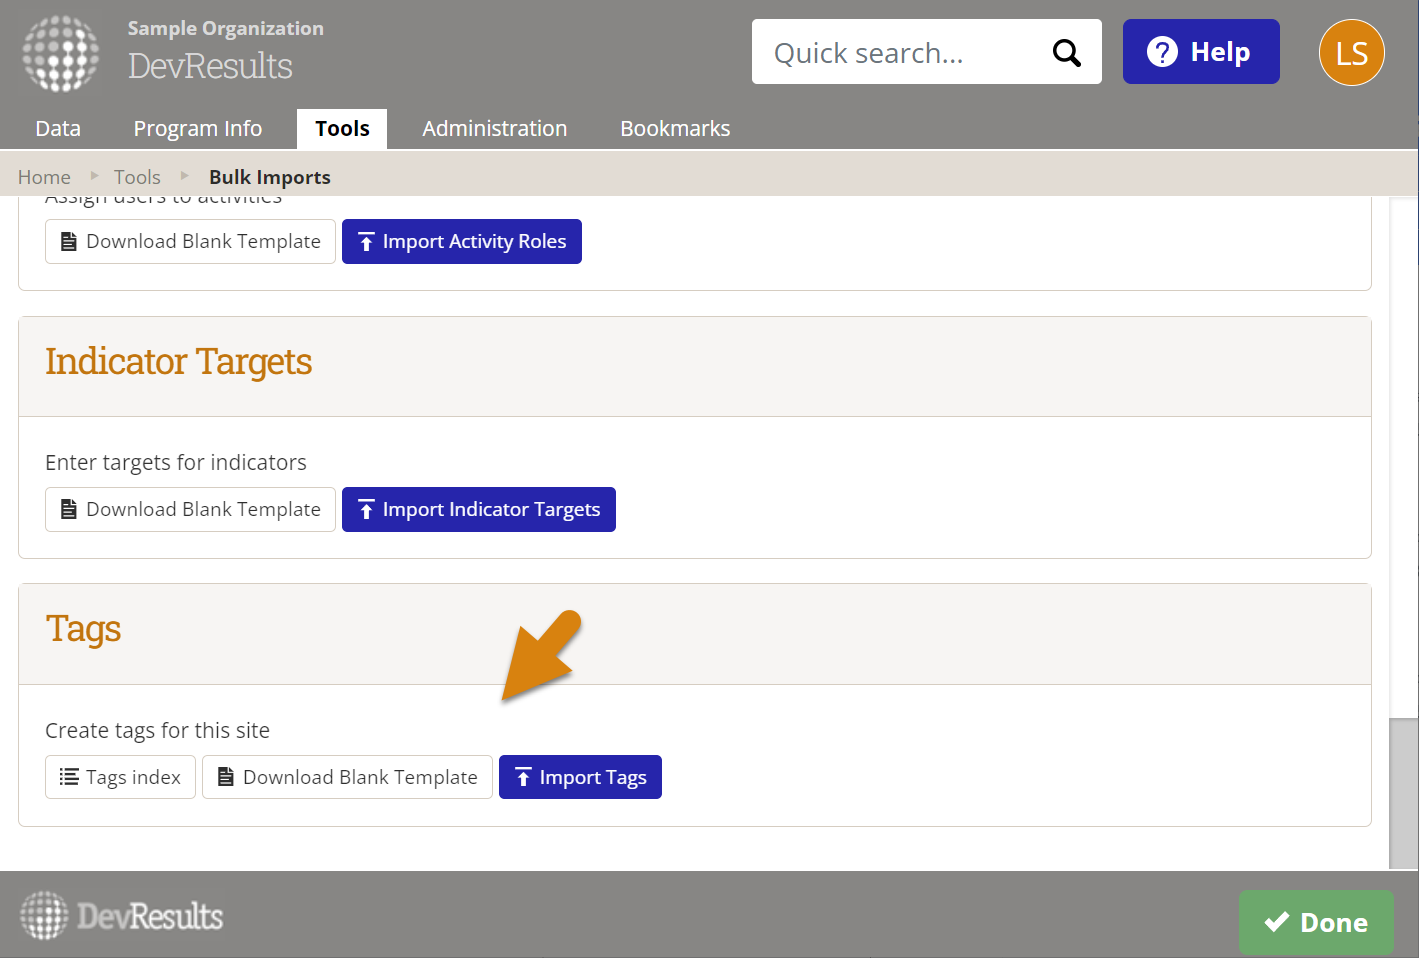
On the Tools > Bulk Imports page, we've added an option to download a Tags template.
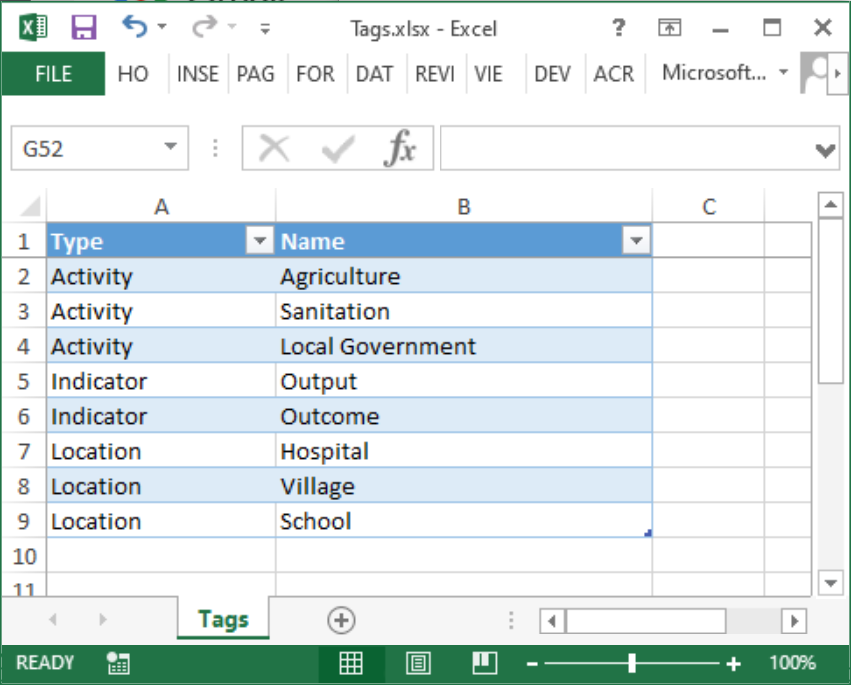
This template lets you add tags of any type, such as project, indicator, and location tags. Add the new tag in the Name column and note the type in the other.
Once you've completed the template and saved it, import it to the same page by clicking on the Import Tags button and following the prompts.
Assign a tag
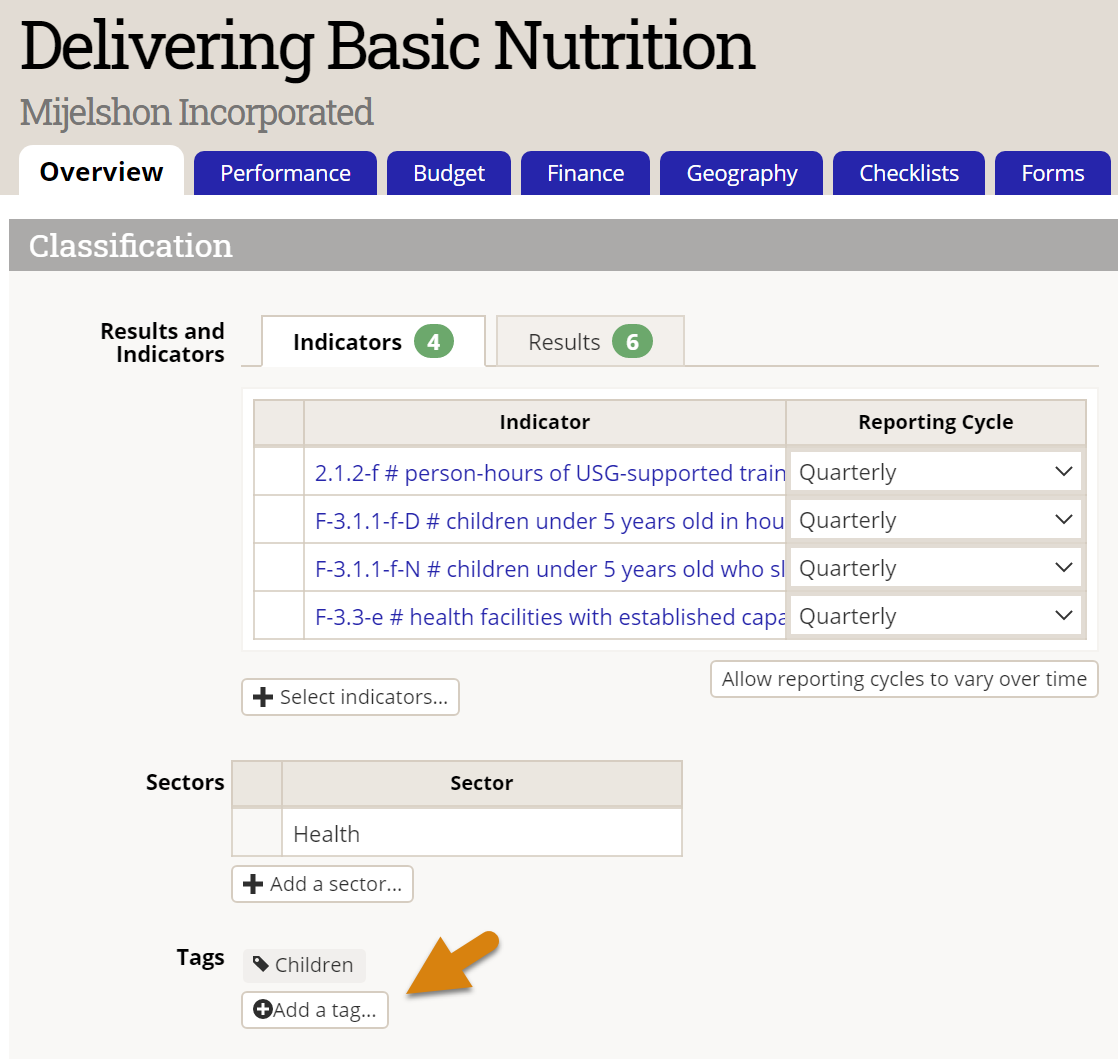
Once you've created tags, navigate to the definition page for any project, data table, indicator, location, organization, or photo. Assign a tag by clicking on the + Add a tag... button. Select a tag from the drop down menu to save the tag assignment. You can assign unlimited tags.
This example shows where to assign a tag to a project:
Use tags to filter information
Tags can be used to filter information in indices and reports.
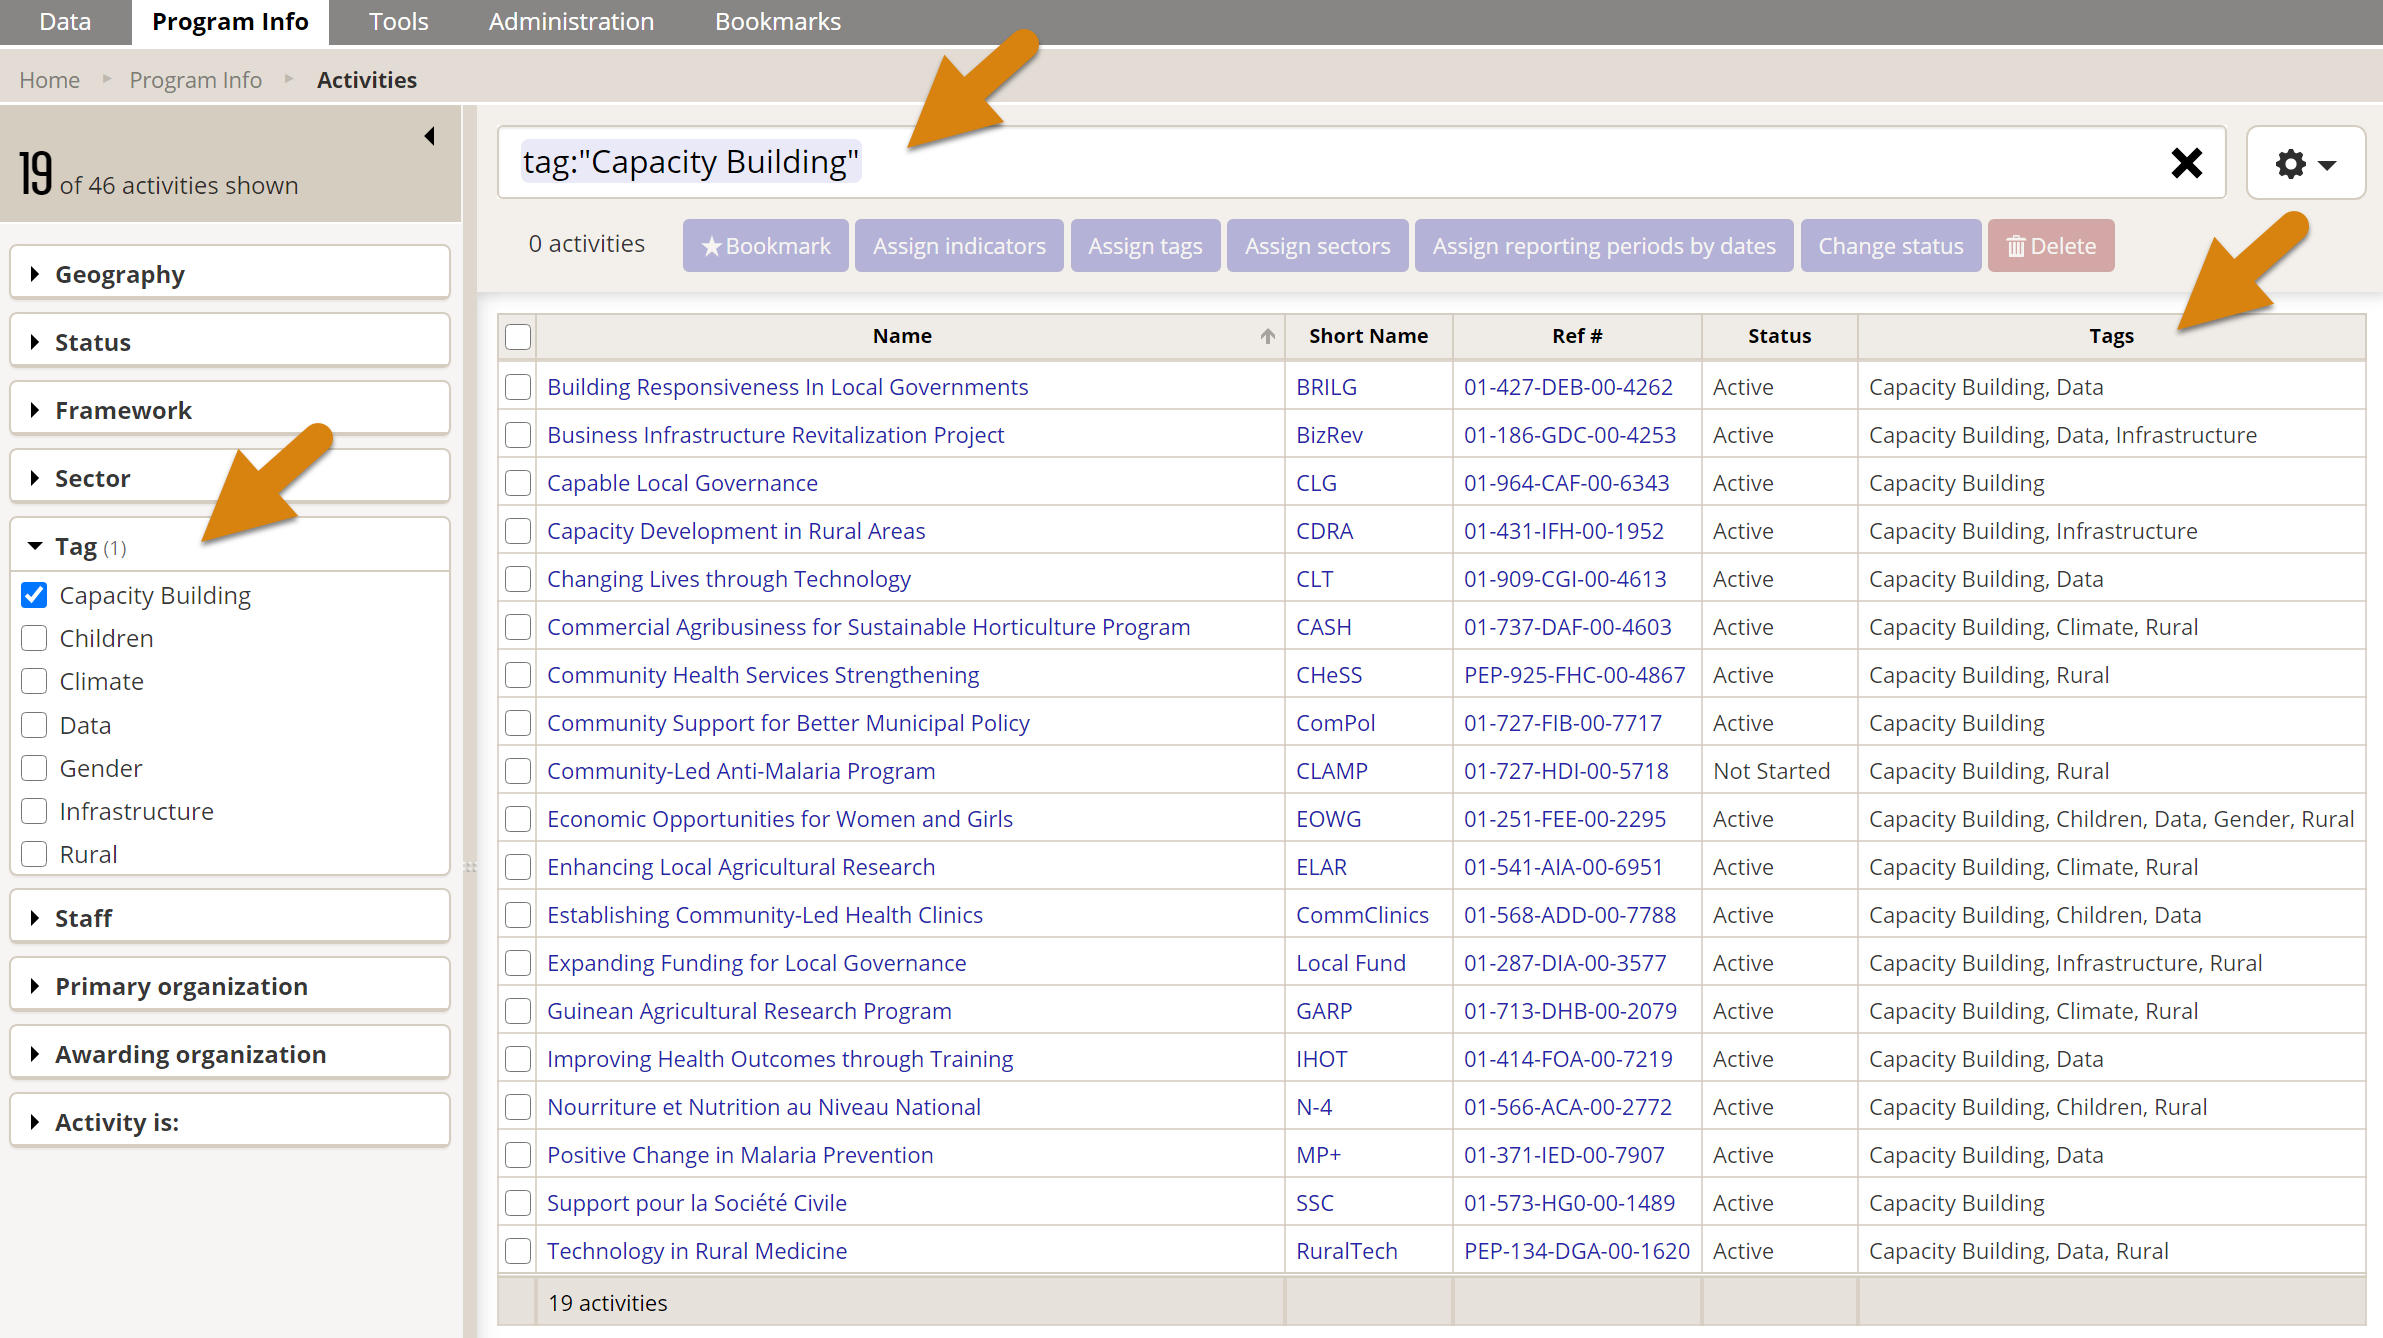
For example, the project index can be filtered to show only projects with a certain tag.
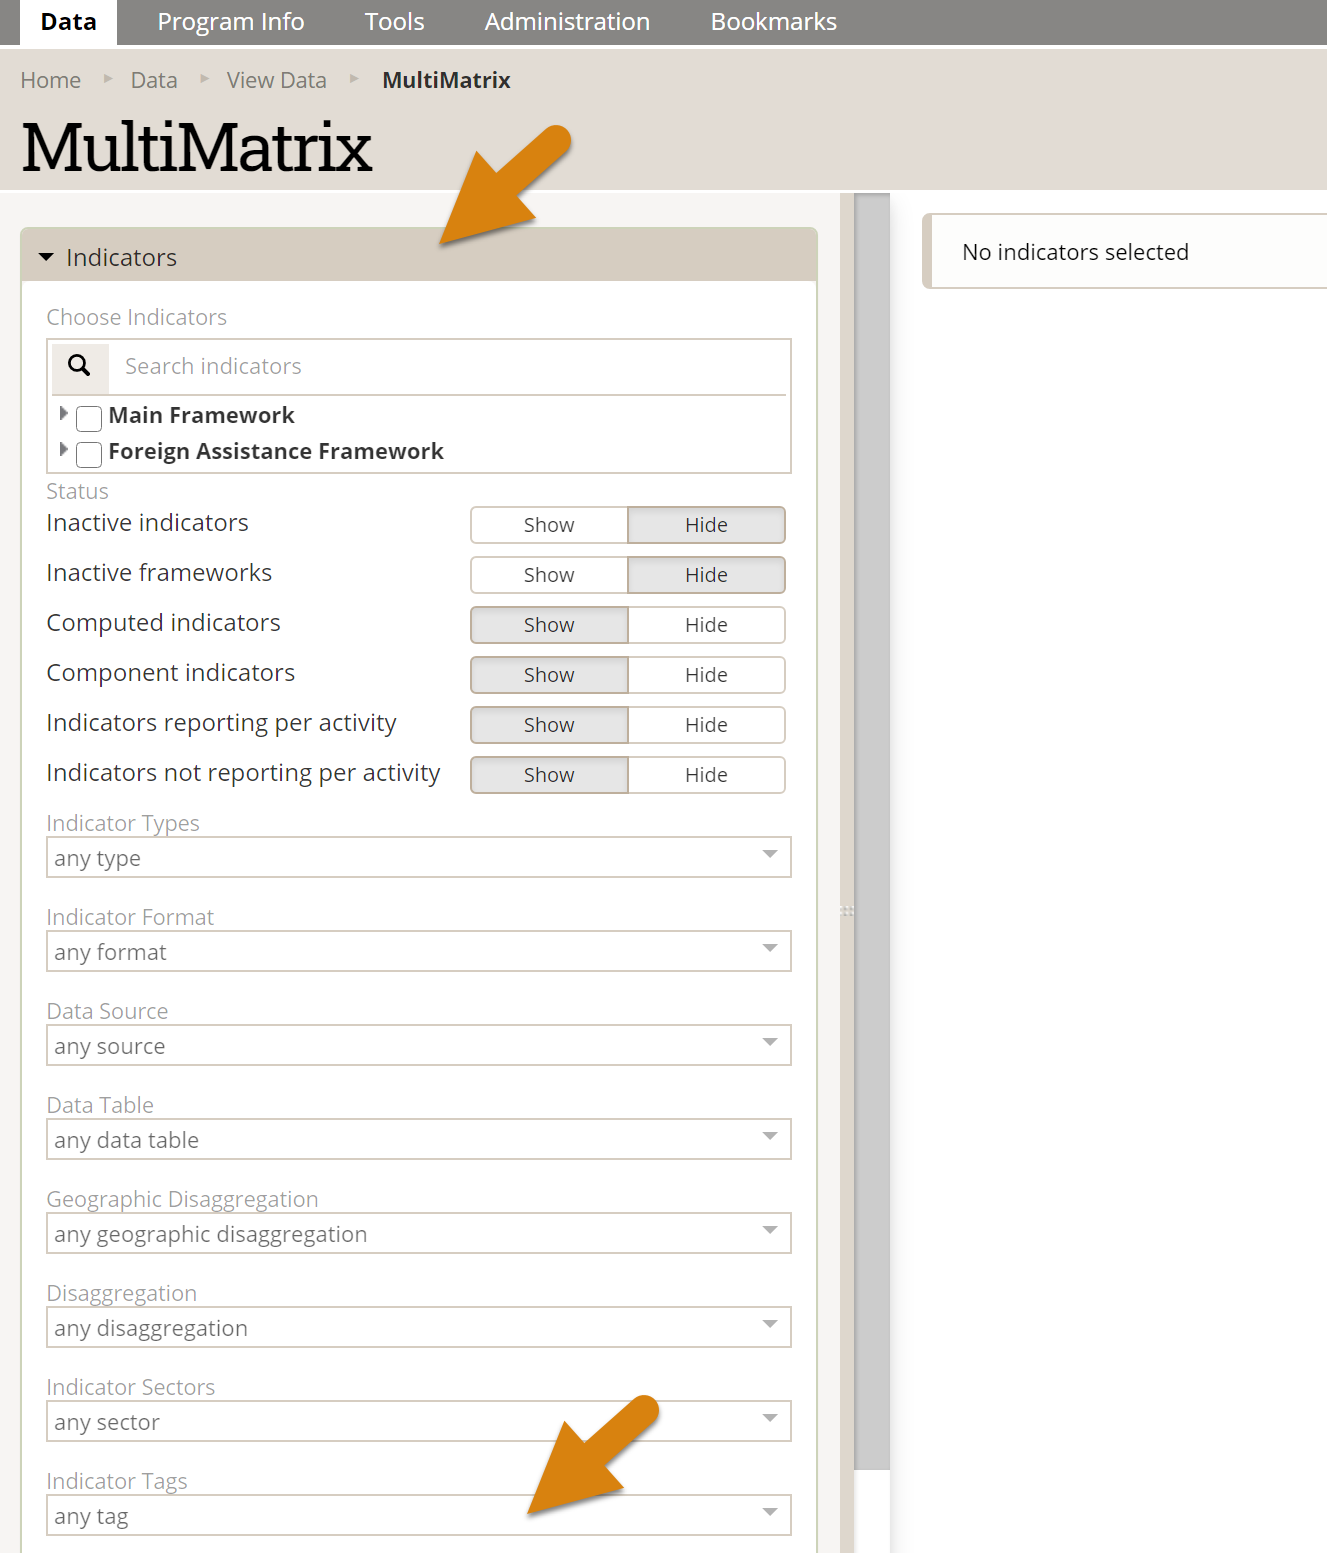
When creating a MultiMatrix report, the selection panel for Indicators can be filtered to only indicators with a certain tag. This lets you easily find indicators for just one tag (or a set of tags) to include in the report. In the MultiMatrix Filters panel you can filter the report by only including data for projects or locations with a certain tag (or set of tags). For example, if many projects report on the indicator # people trained, you could create a report that only includes data reported by capacity building projects by choosing the Capacity Building tag.
Create a sector
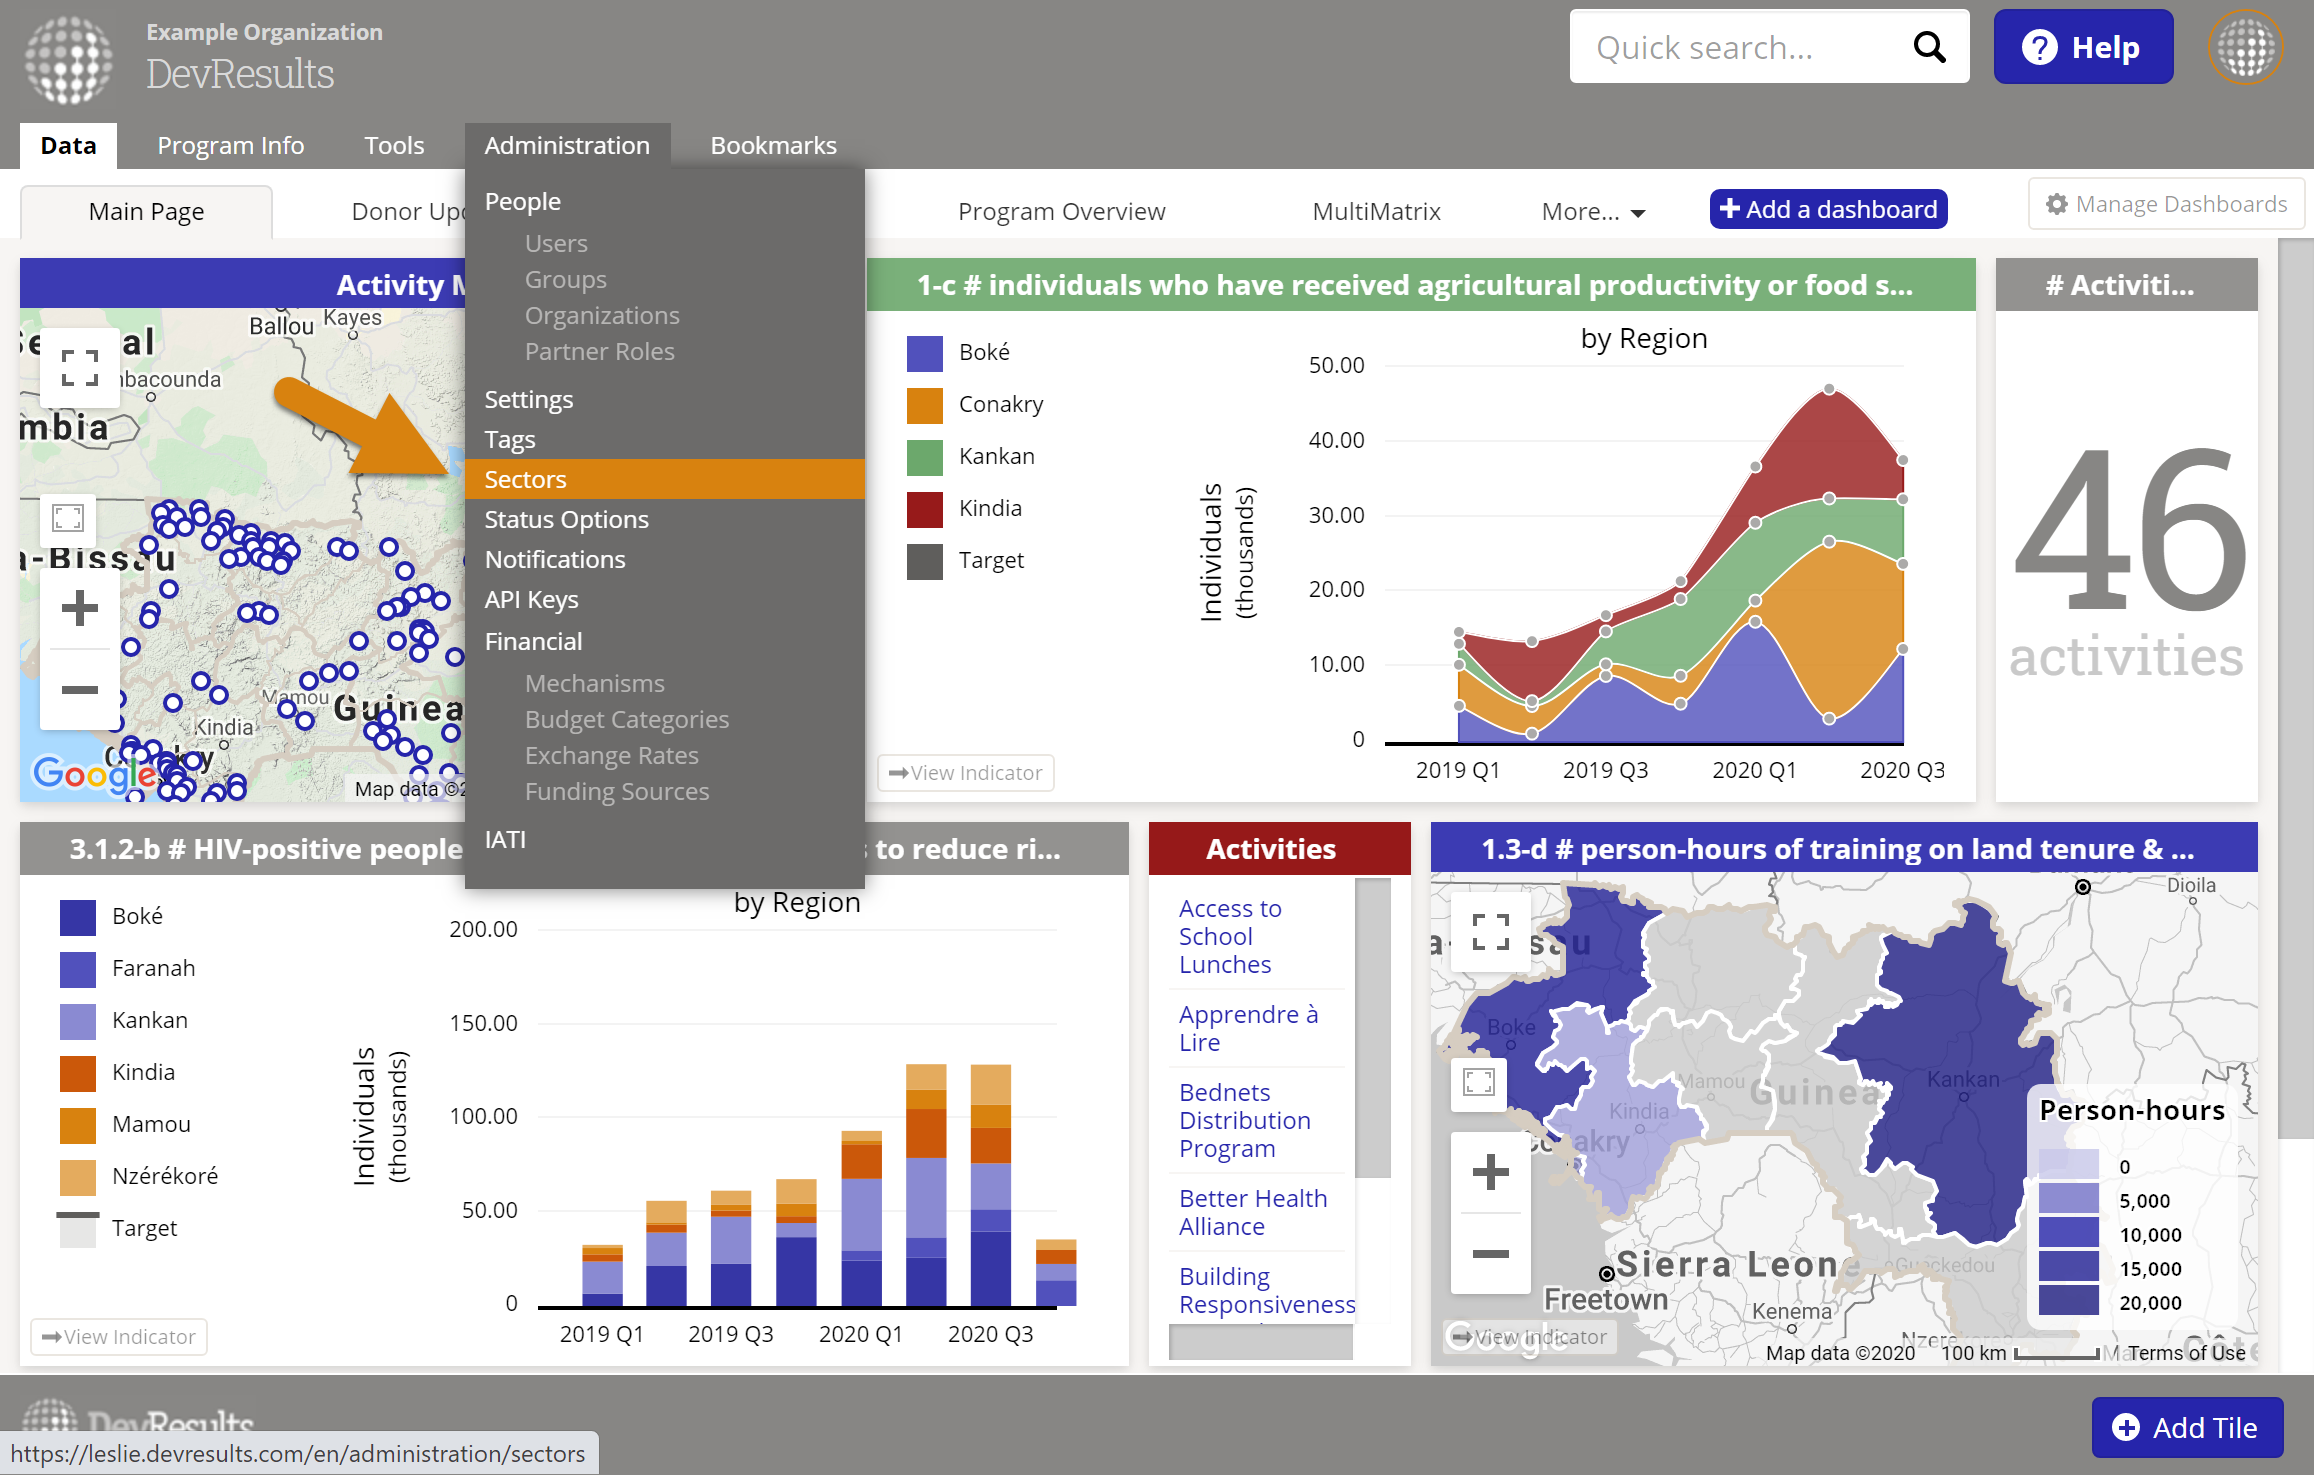
To create a new sector, go to Administration > Sectors.
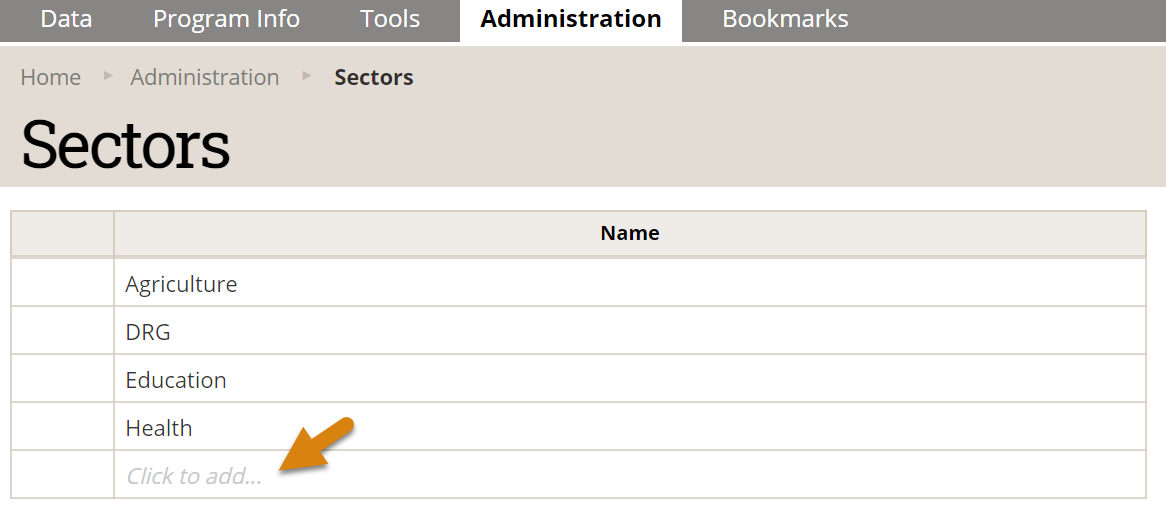
Click on the grey Click to add... text at the bottom of the table and add the name of your new sector. Click anywhere outside of the cell to save the sector.
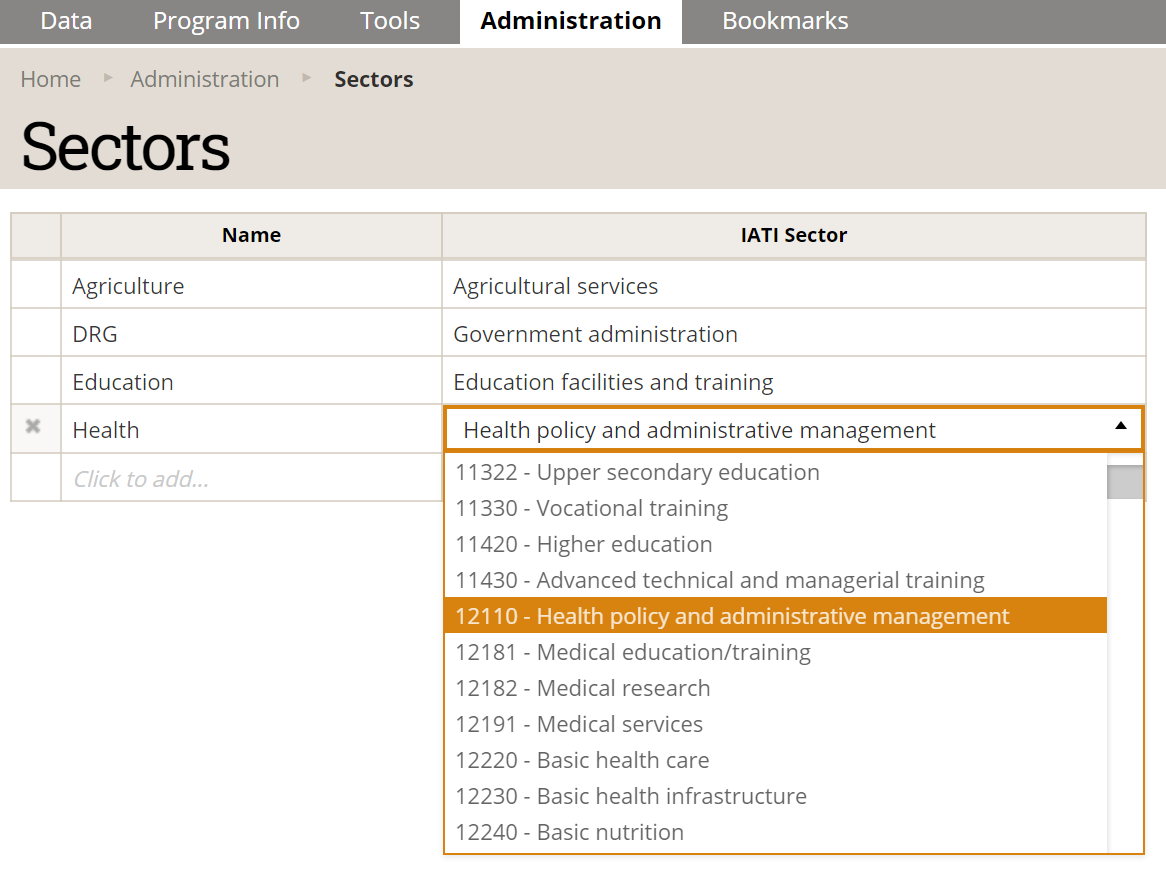
If your site is IATI-enabled, select the corresponding IATI sector by clicking on the dropdown menu under IATI Sector.
To edit an existing sector, click on the sector text, edit it, and click anywhere outside of the cell to save the change.
To delete a sector, hover over the sector and click on the orange X that appears to its left.
Assign a sector
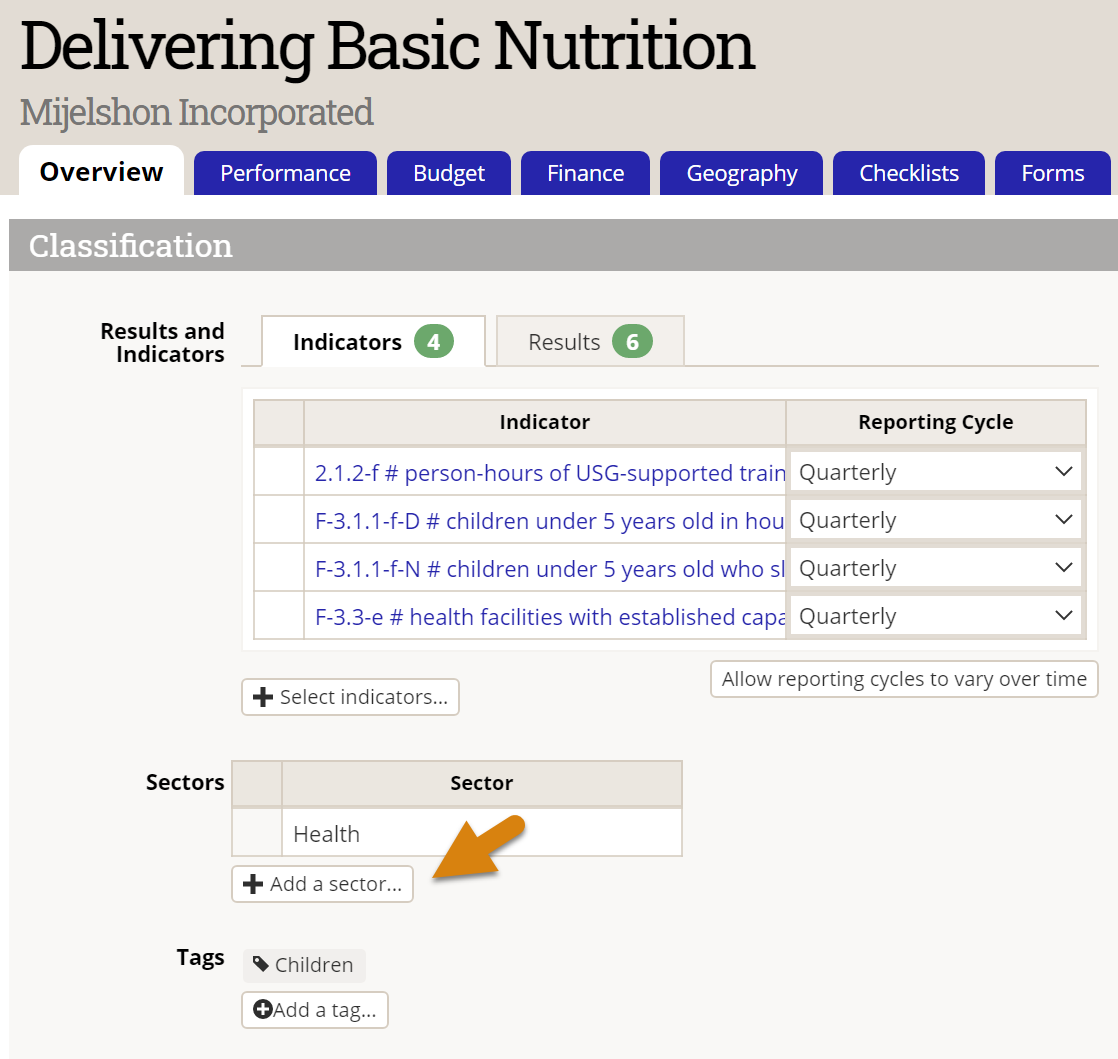
Once you've created sectors, navigate to the definition page for any project or indicator. Assign a sector by clicking on the + Add a sector... button. Select a sector from the drop down menu to save the sector assignment. You can assign unlimited sectors.
This example shows where to assign a sector to a project:
Use sectors to filter information
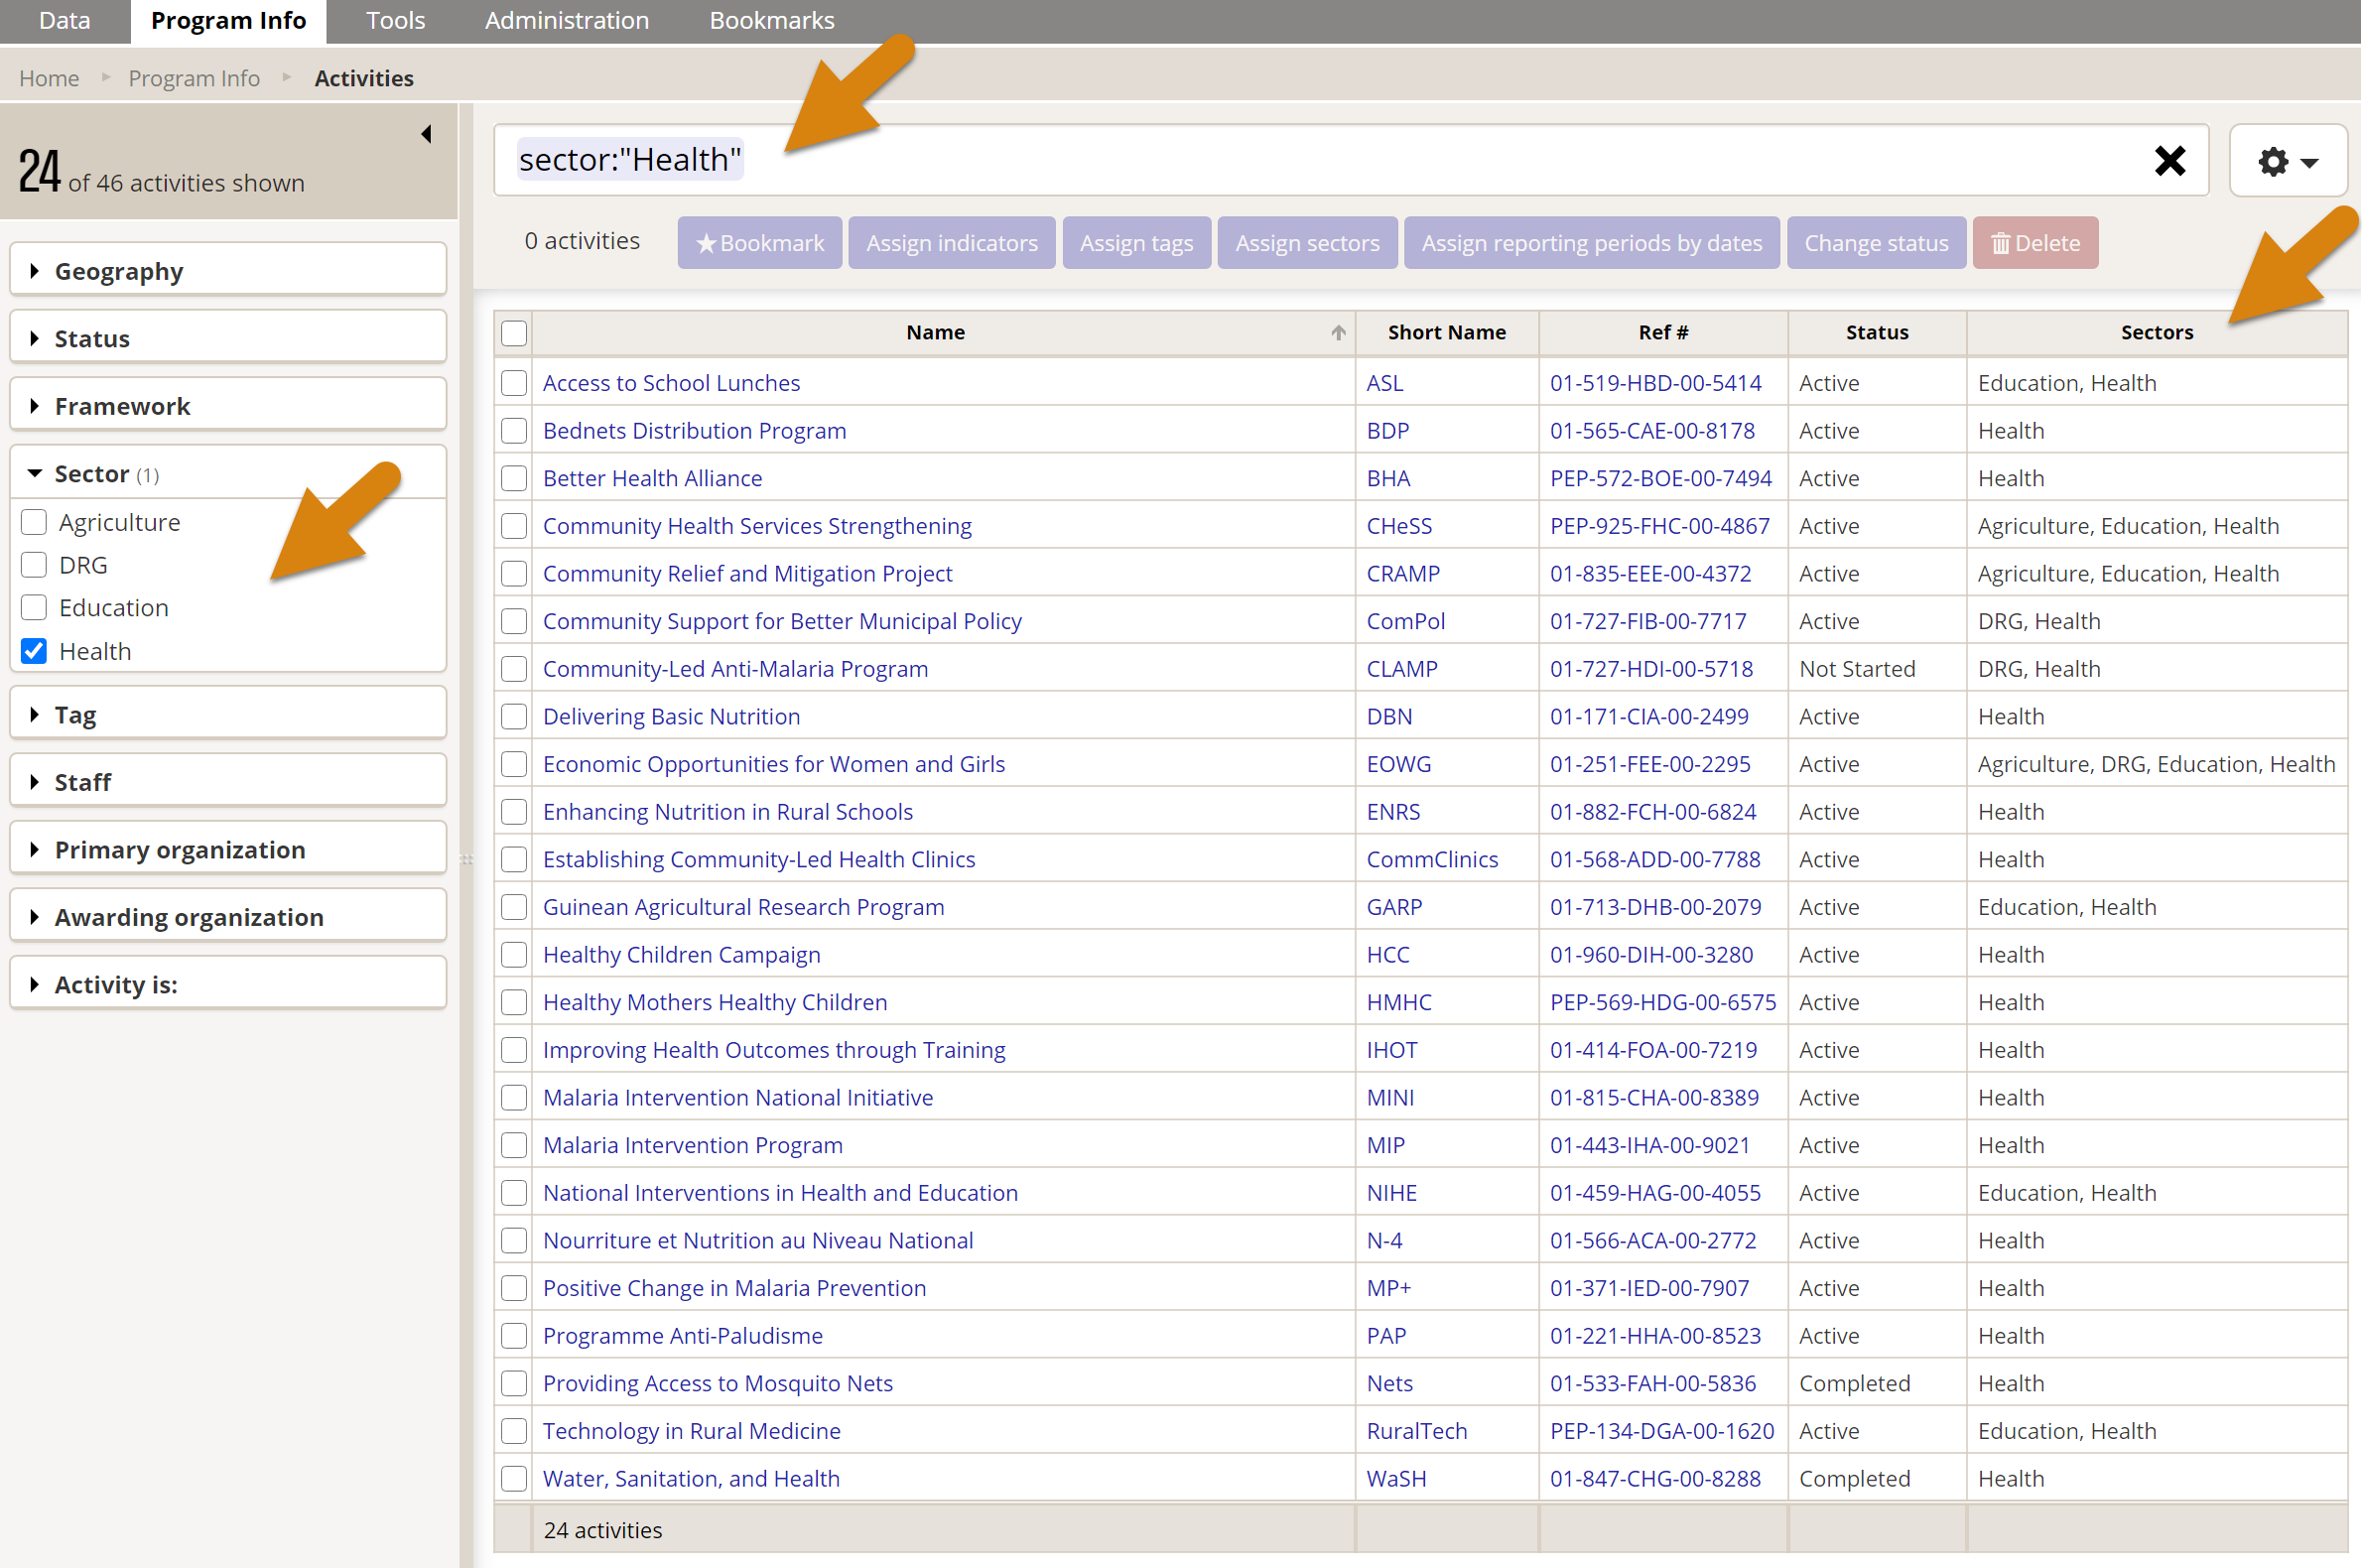
Sectors can be used to filter information in indices and reports.
For example, the project index can be filtered to show only projects with a certain sector.
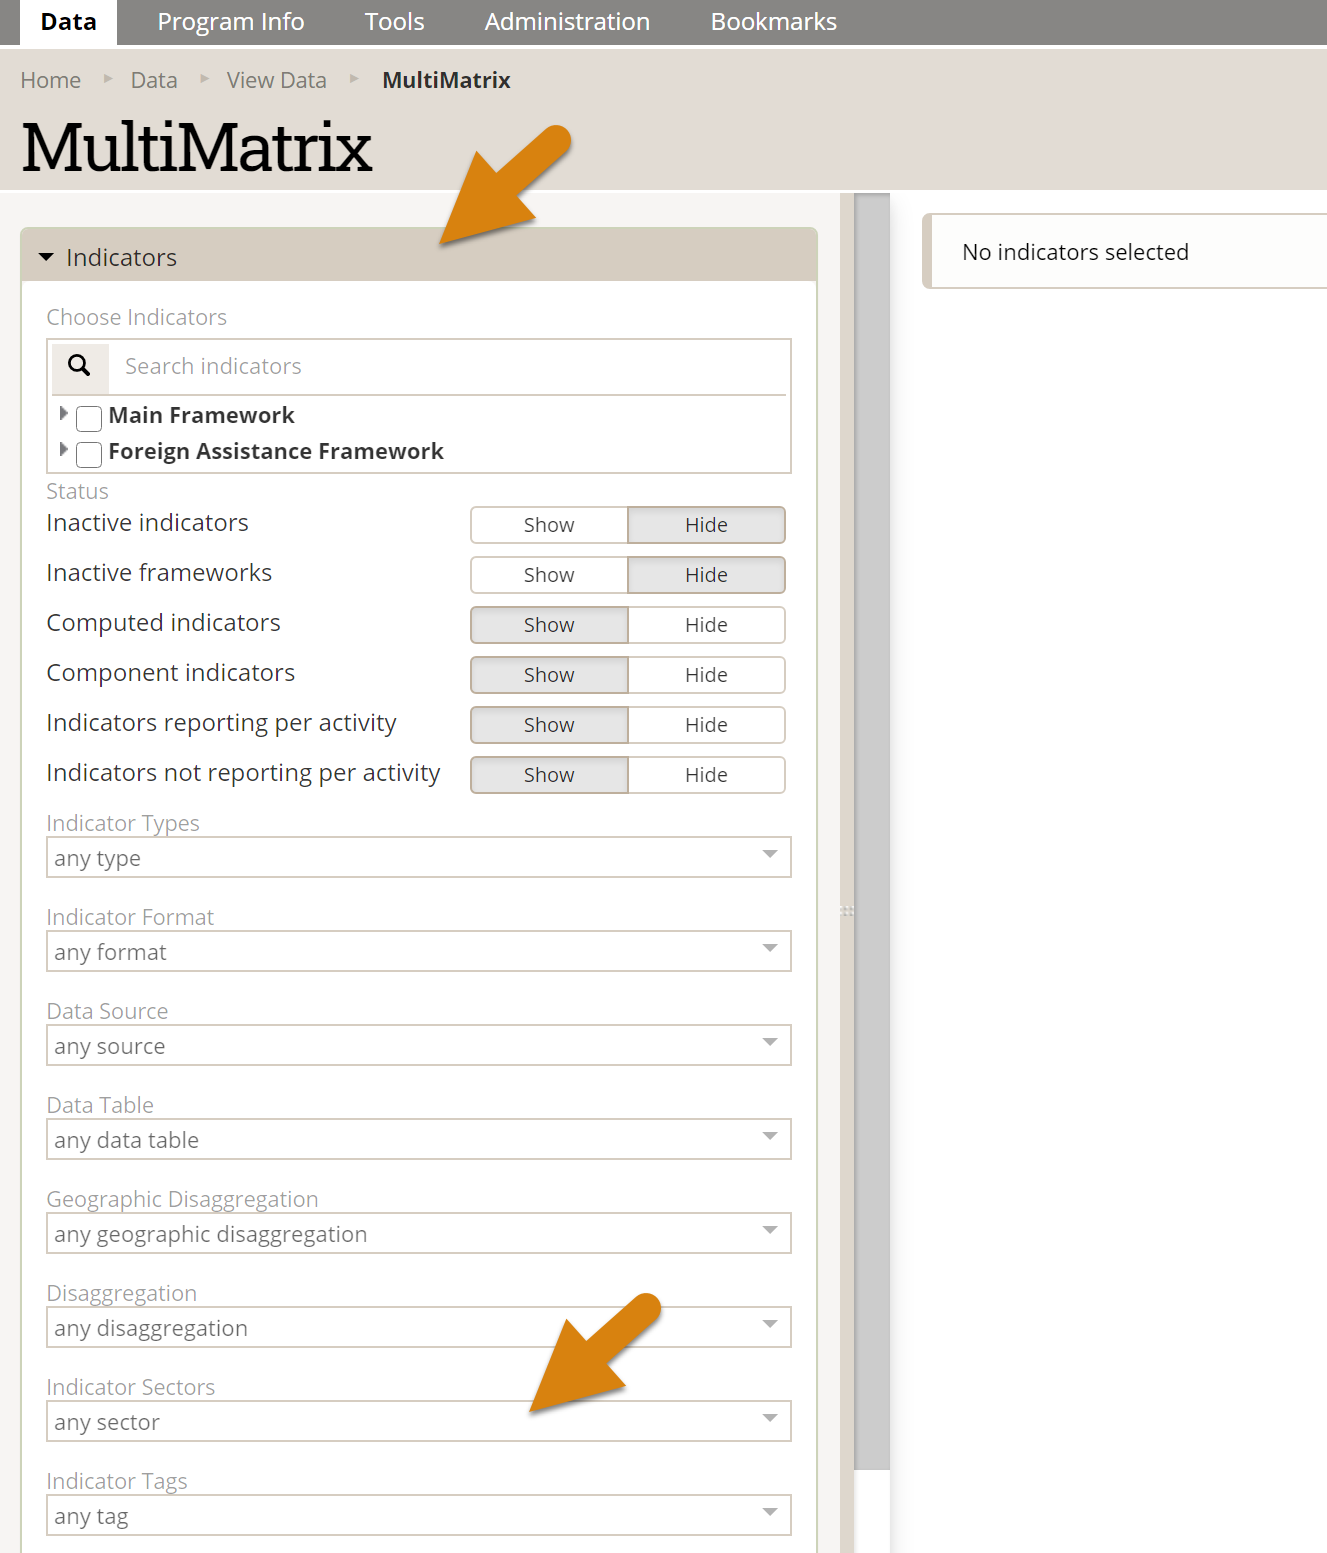
When creating a MultiMatrix report, the selection panel for Indicators can be filtered to only indicators with a certain sector. This lets you easily find indicators for just one sector (or a set of sectors) to include in the report. In the MultiMatrix Filters panel you can filter the report by only including data for projects with a certain sector (or set of sectors). For example, if many projects report on the indicator # people trained, you could create a report that only includes data reported by health projects by choosing the Health sector.
Didn't answer your question? Please email us at help@devresults.com.